You’ve probably heard the rumor: “ActiveCampaign is powerful…but isn’t it hard to set up?”
The short answer is no. Powerful automations may look tricky to manage, but that’s only if you skip the shortcuts. In this guide, we’ll prove it.
Our fast-track manual to ActiveCampaign starts with easy wins that you can launch now:
- Lists and tags that mean something
- A simple campaign that customers actually open
- A first email workflow that runs itself
- A “set-it-and-forget-it” nurture that keeps leads warm
Next, we’ll provide pre-built recipes and templates for expansion, and handy tips to avoid pitfalls along the way. We’ll also show you exactly where to watch the numbers: opens, clicks, conversions, revenue—right inside ActiveCampaign’s dashboards. You’ll learn how to read them and how to turn every insight into your next lift.
If you can write an email, you can launch your first automation today. (And if that sounds hard, we have AI email content generation to help you crank out a draft!) Follow along to find value from day one and stack your wins.
6 building blocks of marketing automation workflows
You don’t need a sprawling blueprint to get value. These six simple building blocks will provide you with the essentials: a working system that captures leads, welcomes them, and nudges them toward purchase. And all of that on autopilot.
Here are the basics that we’ll kick off with:
- Lists and tags: a tidy contact base so you always know who’s who.
- Segments: smart slices (e.g., “engaged last 30 days”) for targeted sends.
- Forms: turn traffic into subscribers with a clear offer.
- First campaign (newsletter): a simple, repeatable send.
- Site and event tracking: see what people do, not just what they open.
- Basic automation: an “always-on” flow that compounds results.
We’ll walk through each building block with the quickest path to done, so you can launch today and refine as you go.
Building block 1. Organize contacts with lists and tags (in 2 minutes)
Getting your contacts tidy on day one makes everything else easier. The best way to keep them organized is by using lists and tags.
Lists are broad permission buckets. Most small teams only need one list for all subscribers, representing “people who’ve opted in to hear from us.” You may eventually need additional lists, for example, if you cover multiple products, brands, or regions, but we’ll start with one.
Tags are flexible labels you can add and remove freely. Use them to add meaningful detail, track interests, sources, milestones, characteristics, or behaviors (e.g., region-us, interest-new-releases, abandoned-cart, vip). Tags are the secret to precise targeting and automation triggers.
A good rule of thumb is to have one list, many tags. Lists can control permission to send, while tags control who gets what and when.
Step 1: Create your main list
- In your ActiveCampaign dashboard, go to Contacts → Lists.
- Click Add a list. Name it Main List and add a short description like “Primary marketing subscribers.”
- Click Add. This will be your default destination for contacts.
Step 2: Import your contacts
You can start with any CSV (from your store, CRM, or newsletter tool).
- In the left nav, open Contacts and click Import.
- Upload your CSV. You’ll see a mapping screen. Match each column to a field (e.g., Email, First name, Last name). The Email field is required.
- Under Add to list, choose your Main List.
- Click Import. ActiveCampaign will create or update contacts and place them on your chosen list.
An animated walk-through showing how to import contacts into ActiveCampaign from a CSV file.
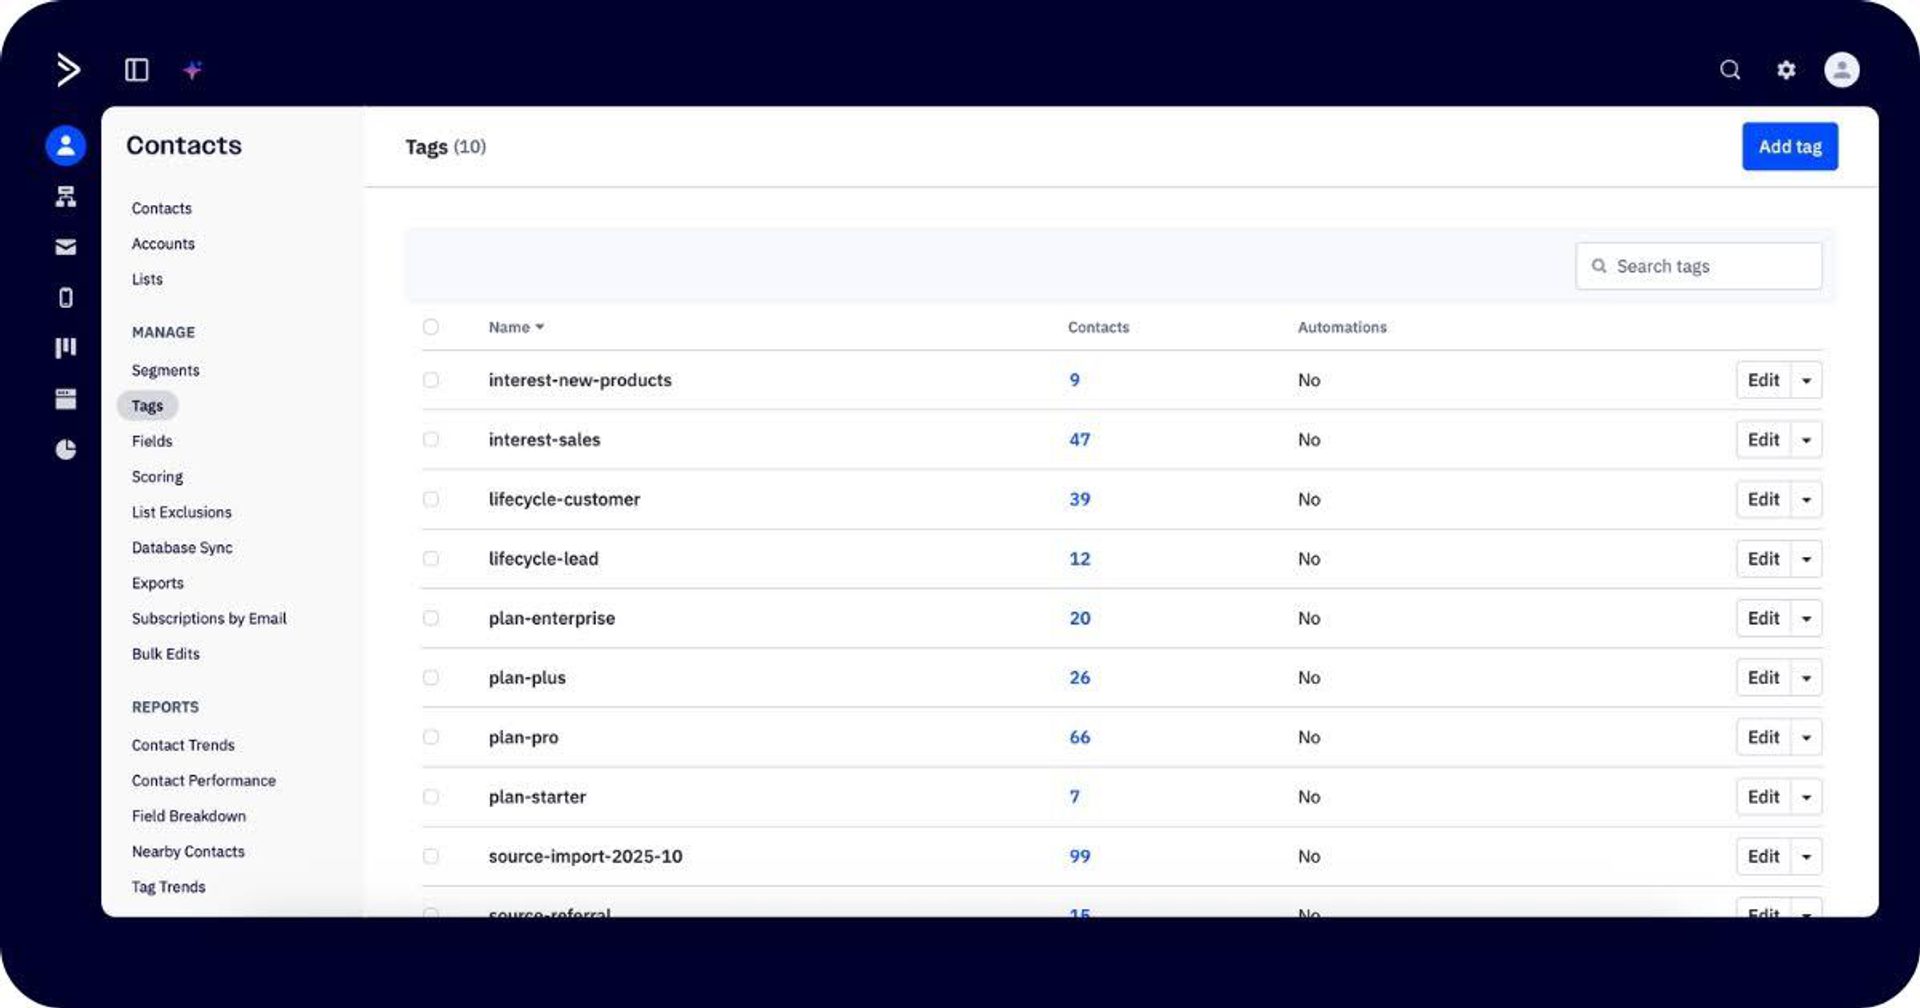
Step 3: Establish a simple tag schema
Decide on a few tag categories you’ll actually use. For example:
- Source: how they got here (e.g., source-import-2025-10, source-referral).
- Lifecycle: where they are with you (e.g., lifecycle-lead, lifecycle-customer).
- Interest/topic: what they care about at a high level (e.g., interest-sales, interest-new-products).
You can choose to Apply a tag to all when importing new contacts. It’s a good idea to do so to keep track of the source.
Top tip: Standardized naming conventions will help you in the future, so decide on these in advance. Some guidelines you should always follow are:
- Use prefixes to group, such as source-*, lifecycle-*, status-*, behavior-*, interest-*, role-*, region-*, language-*, event-*, plan-*.
- Keep tags short, specific, and purposeful.
Building block 2. Segment audiences easily based on behavior and conditions
Lists and tags give you structure; segments give you precision. A segment is an intelligent, dynamic group of contacts that is based on behavioral triggers—like “has the tag interest-new-products AND clicked any email in the last 30 days.” As people qualify (or no longer qualify), they flow in and out automatically, so you can target with confidence and won’t need to “rebuild.”
Step 1: Build your first segment
Let’s build your first segment. We’ll create a simple “interested and active” audience you can reuse.
- Go to Contacts → Search Bar → Advanced Search.
- Click Add condition and select Tag → Exists → type/select interest-new-products (or your own interest tag).
- Click Add another condition and choose Engagement (or Actions → Has opened) → Has opened any campaign → Within last → 30 days.
- Make sure the operator is AND (both must be true).
- Click Search to preview results.
- Click Save as segment, give it a clear name (e.g., engaged—interest-new-products-30d), and save.
This segment intelligently targets people who care about new products and are currently engaged, ideal for timely promos or educational content.
In other platforms, the segment builder lives in one place and can only be accessed there. In ActiveCampaign, the Segment Builder is a floating feature, so you can create segments “on the fly” in several different places:
- Campaigns → when choosing recipients, click Segment Selected Lists to target a subset.
- Contacts → click Advanced Search to filter using the segment builder, then Save as segment for reuse.
- Automations → add an If/Else (or Goal condition) and use the builder to branch based on behaviors/attributes.
It's easy to create and reuse Segments in ActiveCampaign's platform. This example walks through creating a segment based on who has opened an email related to new products.
You can save a segment once and reuse it anywhere you see the Segment option.
Building block 3. Set up a quick form to send new contacts to your list
When someone signs up on your site, you want two things to happen automatically: adding them to your Main List and applying a source tag so you know where they came from. Forms do exactly this. They are the front door to your marketing.
Keep this simple on day one: one clean form, one list, one tag. Let’s walk through turning website visitors into contacts by collecting the basics and sending those contacts straight into your database.
Step 1: Build a basic signup form
- In the left nav, go to Website → Forms and click Create a form.
- Name it something clear, like Newsletter signup, and choose Inline for the form style (easy to embed on any page).
Step 2: Connect the form to your Main List
- In Form actions, click + Add action → Subscribe to list.
- Select Main List and save.
- If you want to use double opt-in, ActiveCampaign can do this for you automatically and even provides a default email template that you can customize later.
Step 3: Customize your form
- Add only essential fields: Email (required) and First name are enough to start. Fewer fields = higher conversion.
- Click Options to set what happens after they submit.
Step 4: Apply a helpful tag on submit
Remember to use source tags to keep your contacts organized.
- Still in the Options sidebar, click + Add action → Add tag.
- Enter a short, descriptive tag such as source-form-newsletter.
- Save. Every new subscriber from this form will arrive with that tag attached.
Step 5: Publish the form on your site
- Click Integrate.
- Choose a publish method:
- Embed code (Best for full control over placement and styling.)
Paste the code directly into your site or CMS. Ideal if you (or your web team) can edit the site’s HTML. Updates to the form automatically sync, but design customization may require CSS tweaks.
- WordPress plugin (Fast and user-friendly for WordPress sites.)
Use the ActiveCampaign plugin to insert the form via a block or widget—no coding needed. Great for marketers who manage content directly, but offers less flexibility than the raw embed code.
- Direct link (Quickest option, no site edits required.)
Use a hosted form URL provided by ActiveCampaign. Perfect for testing, sharing on social media, or capturing leads before your site is ready. However, it may not blend with your site design.
- Place it somewhere obvious, like the header, footer, blog sidebar, or a dedicated landing page with a clear offer.
How to set up a form in ActiveCampaign that automatically adds a user to a newsletter subscription list.
You can quickly test your form by submitting a test email, then opening Contacts and confirming that you see the contact on the Main List.
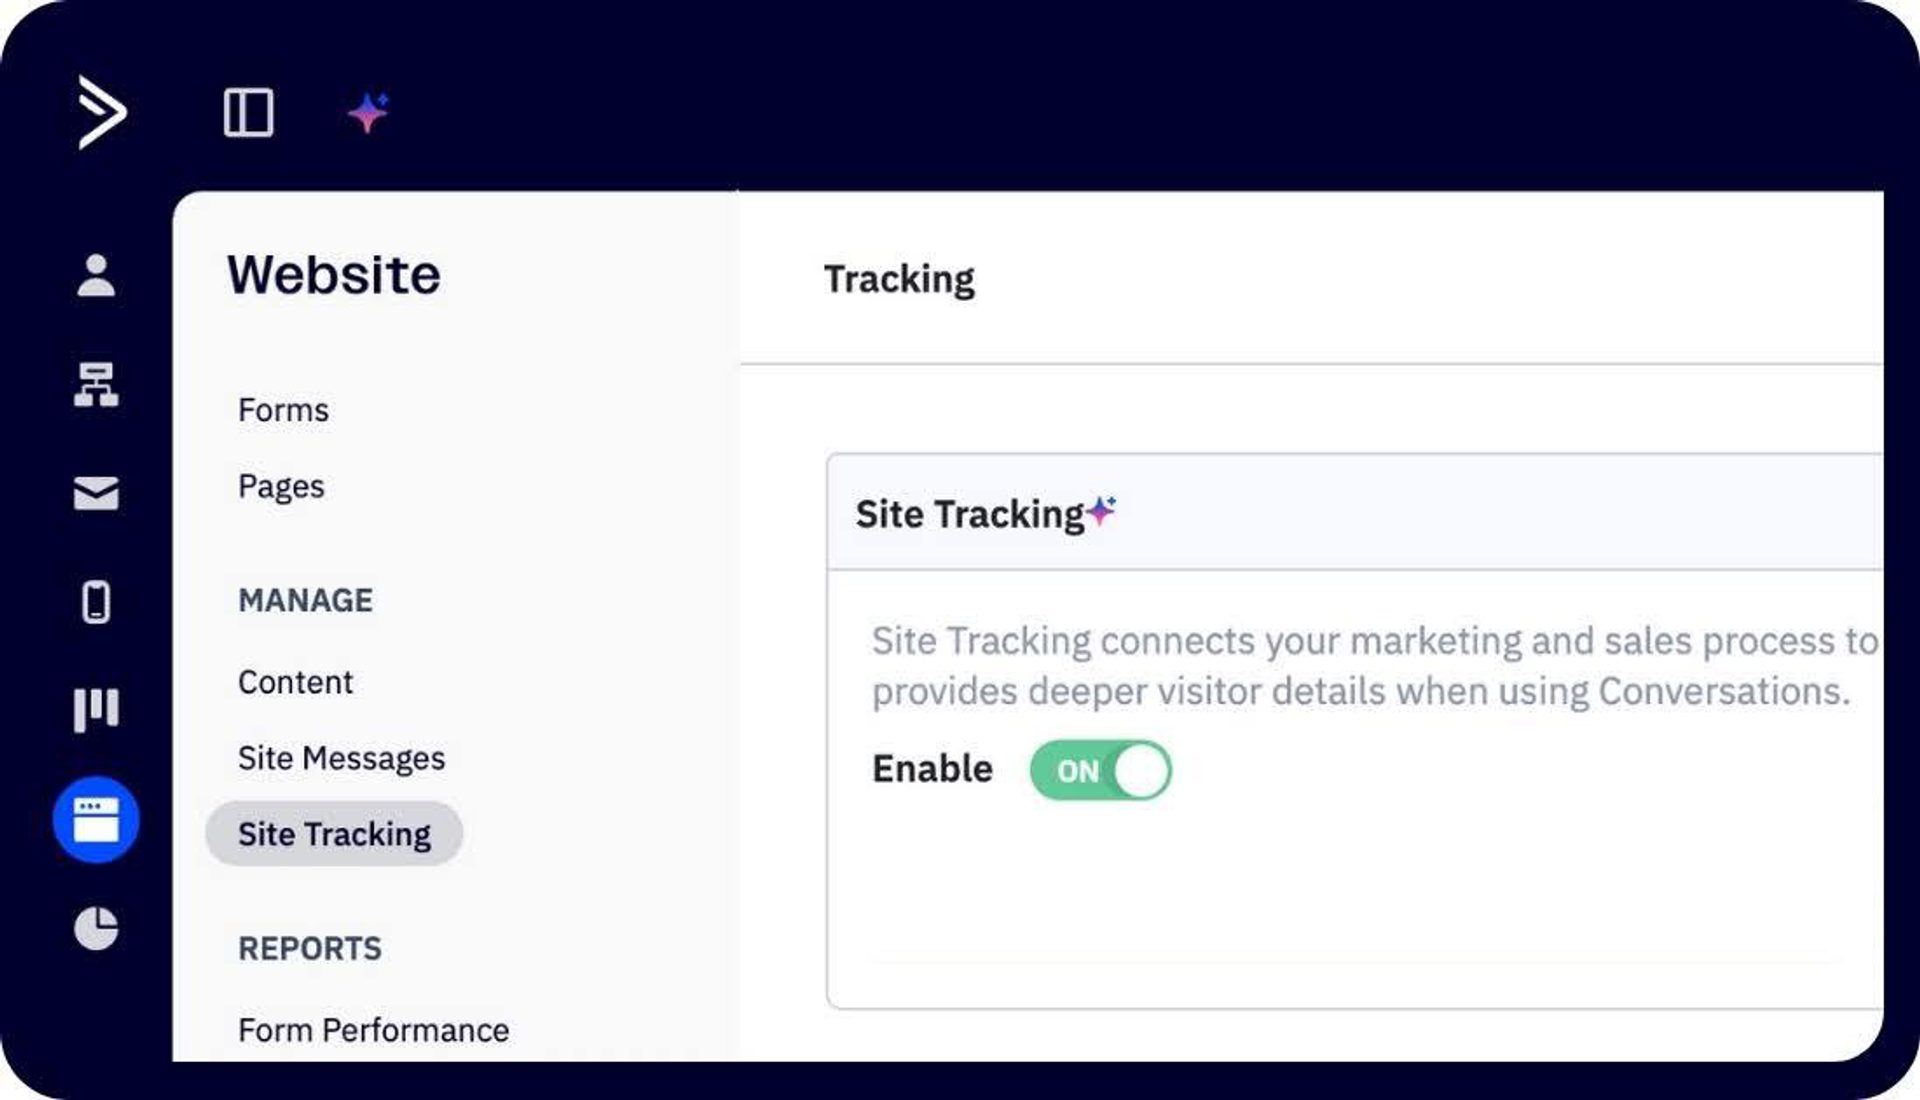
Building block 4. Add effortless site tracking to see what people do on your website
Site tracking records the pages your known contacts visit on your site (like /pricing or /blog/post-name) so you can segment and follow up based on real behavior, not guesses.
Step 1: Turn it on
- Go to Website → Site Tracking.
- In Whitelist domains, add your domain (e.g., example.com) → Save. This tells ActiveCampaign which sites you allow tracking on.
- Toggle Site Tracking On.
Step 2: Install the tracking code
- Copy the snippet shown on the Tracking page.
- You can add the tracking code in a few different ways:
- Install manually (most common): copy the code and paste it right before </head> or </body> on every page (your theme/template usually has a global header/footer included).
- Google Tag Manager: create a new Custom HTML tag, paste the snippet, set All Pages, and publish.
- WordPress/Shopify: use your theme’s header/footer injector or a lightweight “header scripts” plugin/app to paste the snippet once.
Step 3: Identify a contact (so visits tie to a person)
Site tracking ties visits to known contacts. The easiest way to identify someone is when they click a link from one of your emails. ActiveCampaign adds an identifier automatically after that first click.
- Send yourself any test email from ActiveCampaign and click a link to your site.
- After that first click, page views from you will start appearing on your contact record.
- Open Contacts → your contact and look for recent Site & Event activity (page URLs) to check that it’s working.
Step 4: Create a simple segment from page visits
Site tracking data is a great resource for creating targeted messages. For example, you might send a comparison guide to users who have visited your pricing page, but have not yet purchased.
- Go to Contacts → Advanced Search.
- Add condition → Website → Has visited and enter a URL or part of a URL (e.g., /pricing).
- Click Search to preview, then Save as segment.
Building block 5. Send your first email campaign today
Your first send should be simple. Start with one targeted send, then layer in an always-on flow.
A great choice for an easy first win is a newsletter: a simple, repeatable send that keeps your audience warm.
Step 1: Build your newsletter
- Go to Email → Campaigns → Create Your First campaign.
- Name it clearly (e.g., newsletter—oct-week-2).
- Select the Standard campaign type for your first send.
- Choose Create with Email Designer to work from a template.
- Pick a clean design from the Basic or Designed Templates; a clear subject, a simple layout with 3–5 sentences of copy, and one primary CTA. You can customize later—speed over perfection today.
Start with a pre-built template from ActiveCampaign's template library, and, in just a few clicks, you can get your newsletter ready to go.
Step 2: Distribute a newsletter to your list
- Choose your Recipients: select Main List or click Segment Selected Lists to target a saved segment.
- Run a test email to yourself to check links work and everything is looking good.
- Finally, Send now or Schedule.
Once you’ve mastered this, you’ll find it easy to set up all of your essential campaigns and can move on to creating triggers that prompt email series or multi-step, “always-on” workflows. These run whenever a contact hits a specific trigger. Unlike one-off campaigns, they keep working in the background.
Some basic workflows you might want to explore early on include:
- A welcome email series that greets new subscribers, sets expectations, and shares useful resources.
- An onboarding workflow that guides new customers through setup steps, activation tips, and quick wins.
- A long-cycle nurturing workflow for complex purchases, spacing education, social proof, and light check-ins over an extended drip period.
- A re-engage workflow that aims to gently win back quiet contacts by reviving interest or cleanly suppress inactives.
Building block 6. Automate workflows to save time (set it once and let it run)
Basic automations take just minutes to set up with ActiveCampaign. If you're new to workflows and looking for a quick way to get started, the best way to do it is by grabbing a ready-made automation recipe that assembles the steps for you.
Let’s try using the Abandoned Cart Reminder recipe. It’s simple to launch with a great ROI. Imagine a customer has left items in their cart without purchasing, and you want to give them a nudge.
Step 1: Connect your store
- Go to Settings → Integrations.
- Connect your eCommerce platform (e.g., Shopify, WooCommerce, BigCommerce).
- Once connected, cart events (like adds, checkouts, and purchases) will automatically sync to ActiveCampaign. Confirm that data is correct.
Step 2: Create your Abandoned Cart automation
- Go to Automations → Create an Automation → Browse Recipes.
- Search for “Abandoned Cart” and select the prebuilt recipe.
ActiveCampaign provides pre-built automation recipes, including this one for abandoned carts. Alternatively, you can build your own from scratch.
Step 3: Customize the journey
- Set your delay—commonly 4–24 hours after the cart is abandoned.
- Edit the email: keep it short, confirm dynamic cart items are included, and add one clear CTA back to checkout.
- Make sure there is an exit condition(usually included) to ensure contacts automatically leave the automation if they complete the order.
- Activate the automation.
Once turned on, your automation runs itself—no manual sending. You can set it and forget it.
If you’ve used Mailchimp, this will feel familiar. Setting up a simple campaign is essentially the same. Both platforms provide automation templates for an abandoned cart reminder with comparably easy editors and scheduling flows.
The difference shows up later. Once you’re ready for smarter branches and compounding touches, ActiveCampaign will let you extend that same flow without switching tools or rebuilding your logic elsewhere. You’ll be able to:
- Branch by intent/value: Split based on cart value, product category, or number of items.
- Trigger behavior-aware follow-ups: If they click but don’t purchase, auto-send a shorter nudge; if they purchase, exit and add a lifecycle-customer tag.
- Stack messages without chaos: Add a second/third reminder with tighter targeting.
- Layer cross-channel options: Add an SMS or site message for high-value carts, no extra tool wrangling.
- Prompt team workflows: Notify sales or support for VIPs; log tags/events for clean reporting later.
The best part is, ActiveCampaign’s templates and automation recipes can do the heavy lifting. You won’t have to do any complex manual work to reach your customers at the right time.
Grow faster with pre-built email templates and automation recipes
When you’re ready to expand, ActiveCampaign’s pre-built resources let you bolt on sophistication in minutes, not weeks. Templates handle the design. Recipes wire the logic. And AI Agents assemble both from a plain-English prompt. You can skip the hard part to deliver those “someday” ideas (drips, win-backs, cart recovery, multi-step journeys) in a few simple clicks.
Email templates: 250+ responsive email templates remove layout and styling work so you can focus on message and CTA, and add new sends for every marketing need without slowing down.
Where to find them: Go to Campaigns → New campaign → Standard → Templates.
Automation recipes: We’ve provided 950+ automation recipes for common industries and use cases, so you’re never re-inventing the wheel.
Where to find them: Go to Automations → Create an Automation → Browse Recipes (search by goal).
Active Intelligence: The fastest path to automation is by using our AI-powered autonomous marketing platform. Describe your goal in everyday language (“re-engage quiet readers over two weeks”), and AI agents will pick the right recipes, plug in triggers/timing, and draft emails for you to review and turn on.
Learn more about using the AI agents in your automations in our video.
These tools flatten the learning curve, so you don’t need to get more technical as your strategy matures. Rather than getting complicated, your marketing will compound.
Plug in these proven automations to boost results
Some high-impact automations you might want to try adding on with templates and recipes include:
- Browse-interest follow-ups: When someone repeatedly views a product category, send a short guide or comparison to keep interest warm and move them toward a decision.
- Consult/demo nudges: If a contact hits pricing twice in a week or spends 90 seconds on a comparison page, offer a 1-click calendar slot to catch intent while it’s hot.
- VIP surprise-and-delight: Recognize high-spend or highly engaged contacts with an occasional perk; tiny effort, big loyalty boost.
- Referral and review moments: When someone leaves positive feedback or renews, ask for a review or referral while goodwill is highest.
- Account risk rescues: Spot inactivity or stalled adoption on subscription services and send a targeted tip, quick loom video, or “can I help?” note to save accounts before they churn.
Start with one or two automations that match your funnel, let them run for a week, and check reporting. If they’re working, you’ll see fewer manual sends, warmer leads, steadier revenue, and more time back for the next win.
How to navigate your ActiveCampaign reports & dashboard without getting lost
You don’t need to be a data expert to get value from ActiveCampaign’s reports. Reporting dashboards can look busy at first glance, but they’re far simpler once you know what you’re looking for. ActiveCampaign keeps the essentials up front and the deep dives one click away. Start confidently: the insights you need are easy to find.
Identify the metrics you want to measure
Before you click into any report, decide what “good” looks like. A few core metrics will tell you, at a glance, whether your message landed and what to improve next.
Core email marketing metrics:
- Open rates: Are people paying attention?
- Click-throughs: Are they taking the next step?
- Unsubscribes: Is your message hitting the mark or missing?
- Conversion tracking (if set up): Tie marketing efforts to sales/revenue.
It’s important to remember that email marketing metrics and SMS marketing metrics are different animals, so make sure you’ve mapped your goals based on your distribution channels.
Keep core metrics in focus and you’ll read your reports with confidence. Everything else is detail you can explore once the basics look healthy.
Use smart insights to understand your data
You don’t need to dig for data to see what’s working in ActiveCampaign. All you have to do is ask. With Active Intelligence for reporting, you can type natural-language prompts right inside your dashboard, like:
“Tell me how my most recent campaigns performed,” or “Which automations are driving the most conversions?”
Active Intelligence instantly analyzes performance and gives you a direct answer to your exact question.
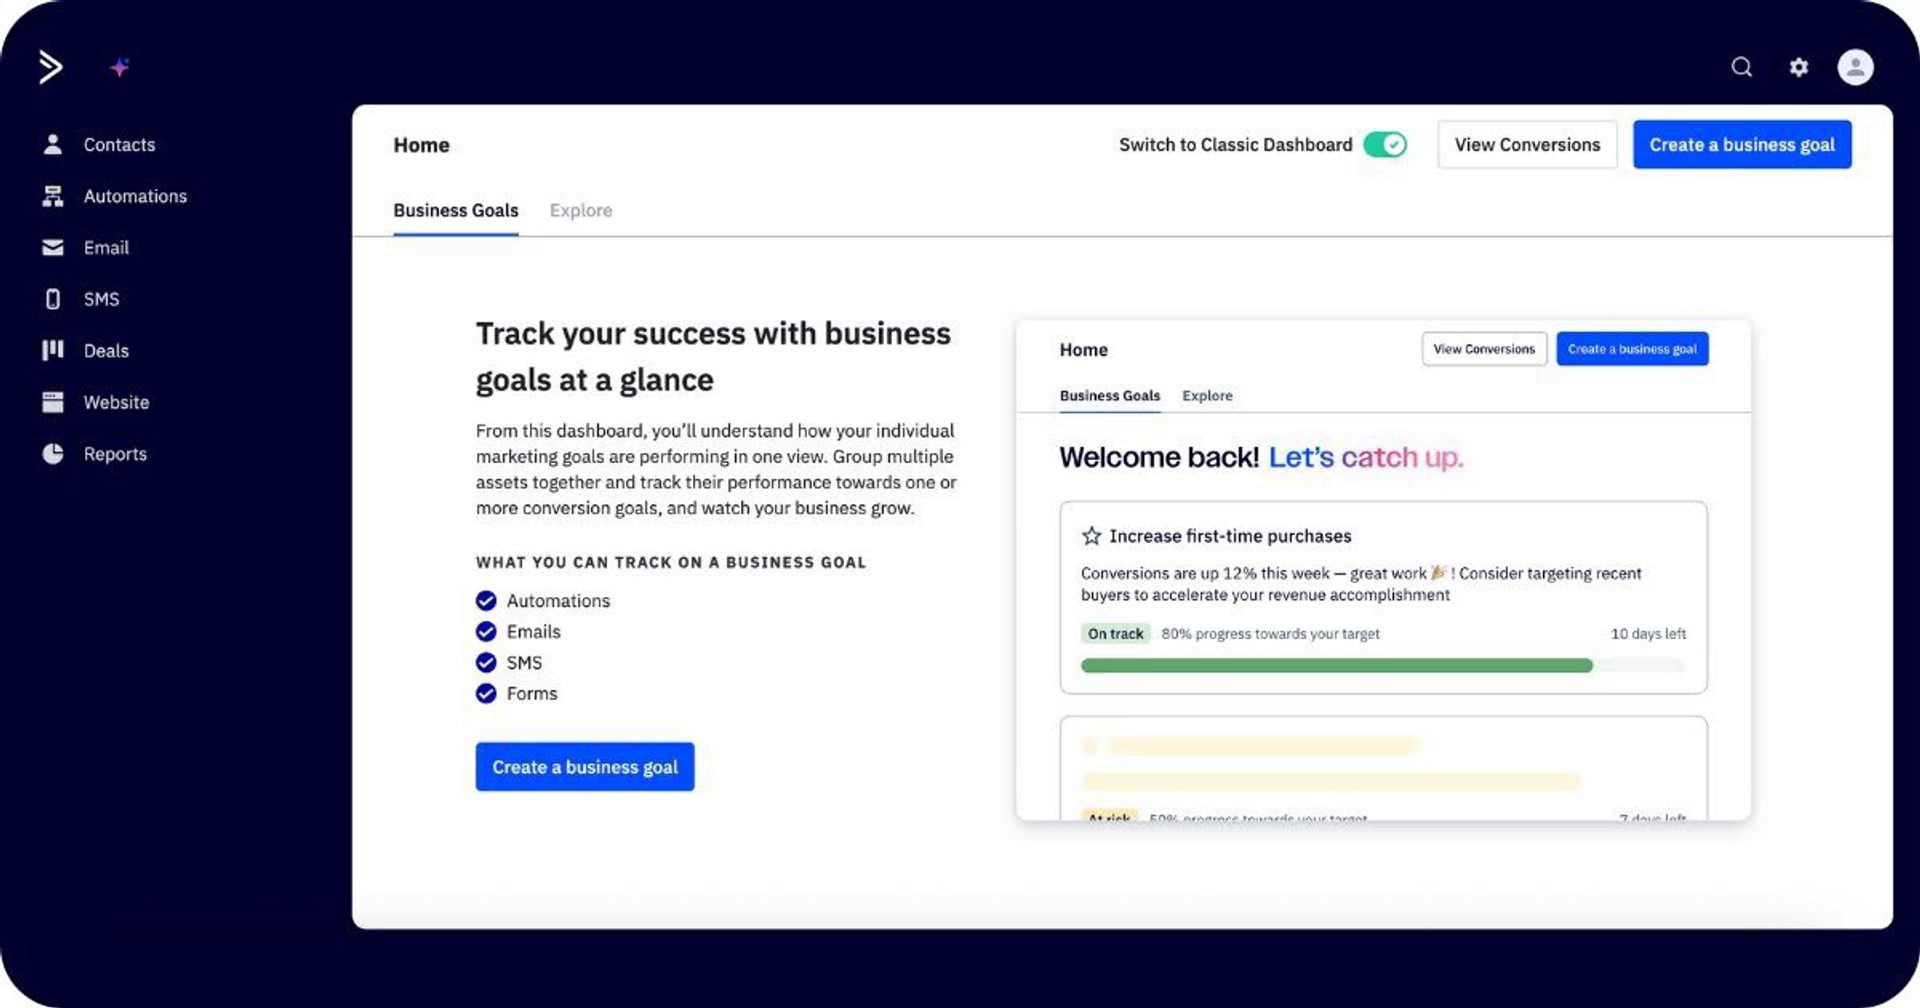
Pair this with Business Goals to track how all your marketing activities contribute to specific goals. Business Goals pulls together campaign, automation, SMS, and form data to track their collective impact on a specific goal like trial starts or purchases.
Keep using these two tools together to spend less time searching for numbers, and more time acting on insights.
Find key data in the dashboard
You’ll move faster when you know which report answers which question. Start with these high-level views before drilling down.
- Campaign reports display opens, clicks, unsubscribes, bounces, and link performance for each send. Use this to see if the message landed and which links pulled interest.
Find these in Reports → Campaigns (all sends), or Campaigns → [campaign] → View Report (just that send).
- Automation reports tell you how many people entered, where they are now, who completed, and where they dropped off. Use this to spot bottlenecks or steps that need a lighter touch.
These live in Reports → Automations (rollup), or Automations → [automation] → View Reports. Then choose the relevant flow.
- Contact reports provide records of a specific contact’s engagement over time: emails received, opens/clicks, site visits, tags, and recent activity. Use this to understand a person’s journey at a glance.
Click into Contacts → search/select a contact and open their record to view.
Turn insights into action
Reports only matter if they change what you do next. Use what you see to make one small improvement, ship, and measure again.
Here are some common findings you should act on quickly:
- Low open rate? Test subject lines and preheaders on your next send. Fast track: swap to a proven Newsletter/Promo template and A/B the subject.
- High clicks but low conversions? The email is doing its job. Fix the landing page. Start by clarifying the headline and tightening the CTA to reduce friction.
- Strong segment performance? Offer that group more. Try sending deeper content or tailored promos to keep momentum.
- Falling engagement over time? Run a light win-back campaign to re-engage inactives and clean your list.
Not sure where to start? We’ll point you in the right direction:
- AI-suggested segments identify groups most likely to convert, churn, or re-engage, then tailor your next message to their behavior.
- Active Intelligence provides tailored, one-click optimizations that instantly apply data-driven improvements.
When you’re ready to act, Active Intelligence can do that for you too. Simply prompt and it will start building a campaign in seconds. No more starting from scratch. You're already at the last mile with a ready-to-use draft, taking care of things that actually matter.
Is ActiveCampaign overkill (or more than I need)?
Short answer: no. ActiveCampaign isn’t overkill. It doesn’t require a giant build to be useful or derive value. With just one list, a few tags, a basic form, an email (like a newsletter), and a short welcome, you’ll be able to go a long way.
Something as simple as a tailored email flow can achieve remarkable results. Take a look at Apple Rose Beauty’s welcome series story, which led to a 300% increase in online sales without adding head count.
The “advanced” stuff is opt-in—templates, recipes, and AI helpers are there when you want more, not before.
Think of it as right-sized on day one, right-powered when you’re ready. You can launch in an afternoon, then add sophistication as your strategy grows, without switching tools or rebuilding from scratch.
Don’t take our word for it. See what our customers have to say…
“ActiveCampaign’s AI Brand Kit made it super easy to pull in our logos and mission statement, and I no longer have to worry about adjusting fonts and colors every time I create an email.” – Adam Sakry, Digital Marketing Specialist, YMCA of Alexandria
“Even if you don't have a huge budget, you start small and it's still an all-in-one solution. It's not only email marketing but you have automation, the CRM, SMS Marketing, and more. On top of that, it's also easy to use.” – Rafal Rejzerewicz, Co-Founder, Krajowe Centrum Edukacyjne
“I really appreciate how easy it was to integrate ActiveCampaign into my business systems. Automations save me time, the interface is intuitive, and I can track engagement in a way that gives me clear insight into what’s working.” – Sheldon V.
“I'm not a tech type of guy so I need easy programs to use. I experimented with a few other apps and ActiveCampaign was the best one.” – Joe P.
ActiveCampaign: simpler than you think, more powerful than you imagine
No other tool combines the same level of ease with enterprise-grade power. Think of it as doing 2x the setup effort, for 10x the power.
ActiveCampaign’s advantages make a huge difference when it comes to shipping and scaling. Remember to:
- Start small, stack wins. One send or flow at a time.
- Name things clearly. Consistent tags/segments keep targeting and reports sane.
- Borrow before you build. Use templates and recipes; customize later.
- Let the numbers nudge you. Check reports, make one tweak, ship again.
Your first automation is closer than you think. Sign up for a 14-day free trial of ActiveCampaign and ship your first wins today.