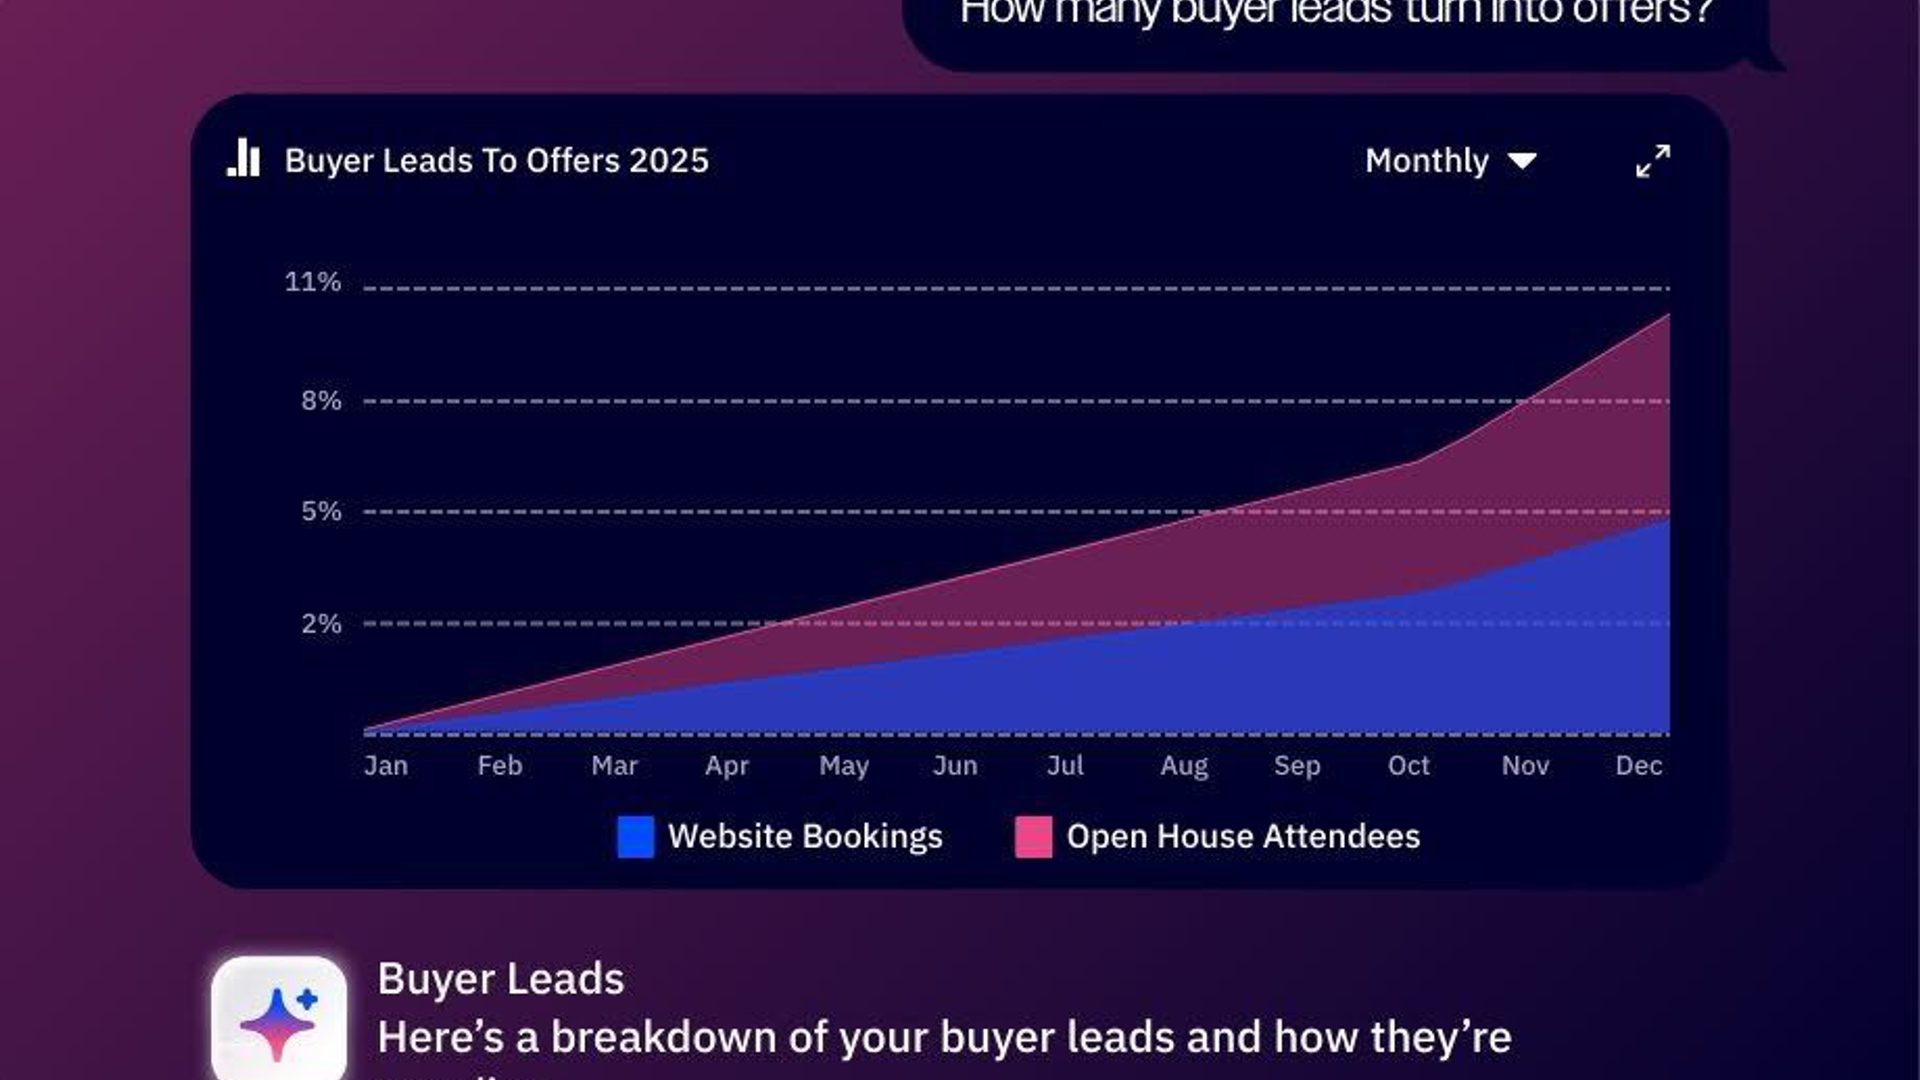
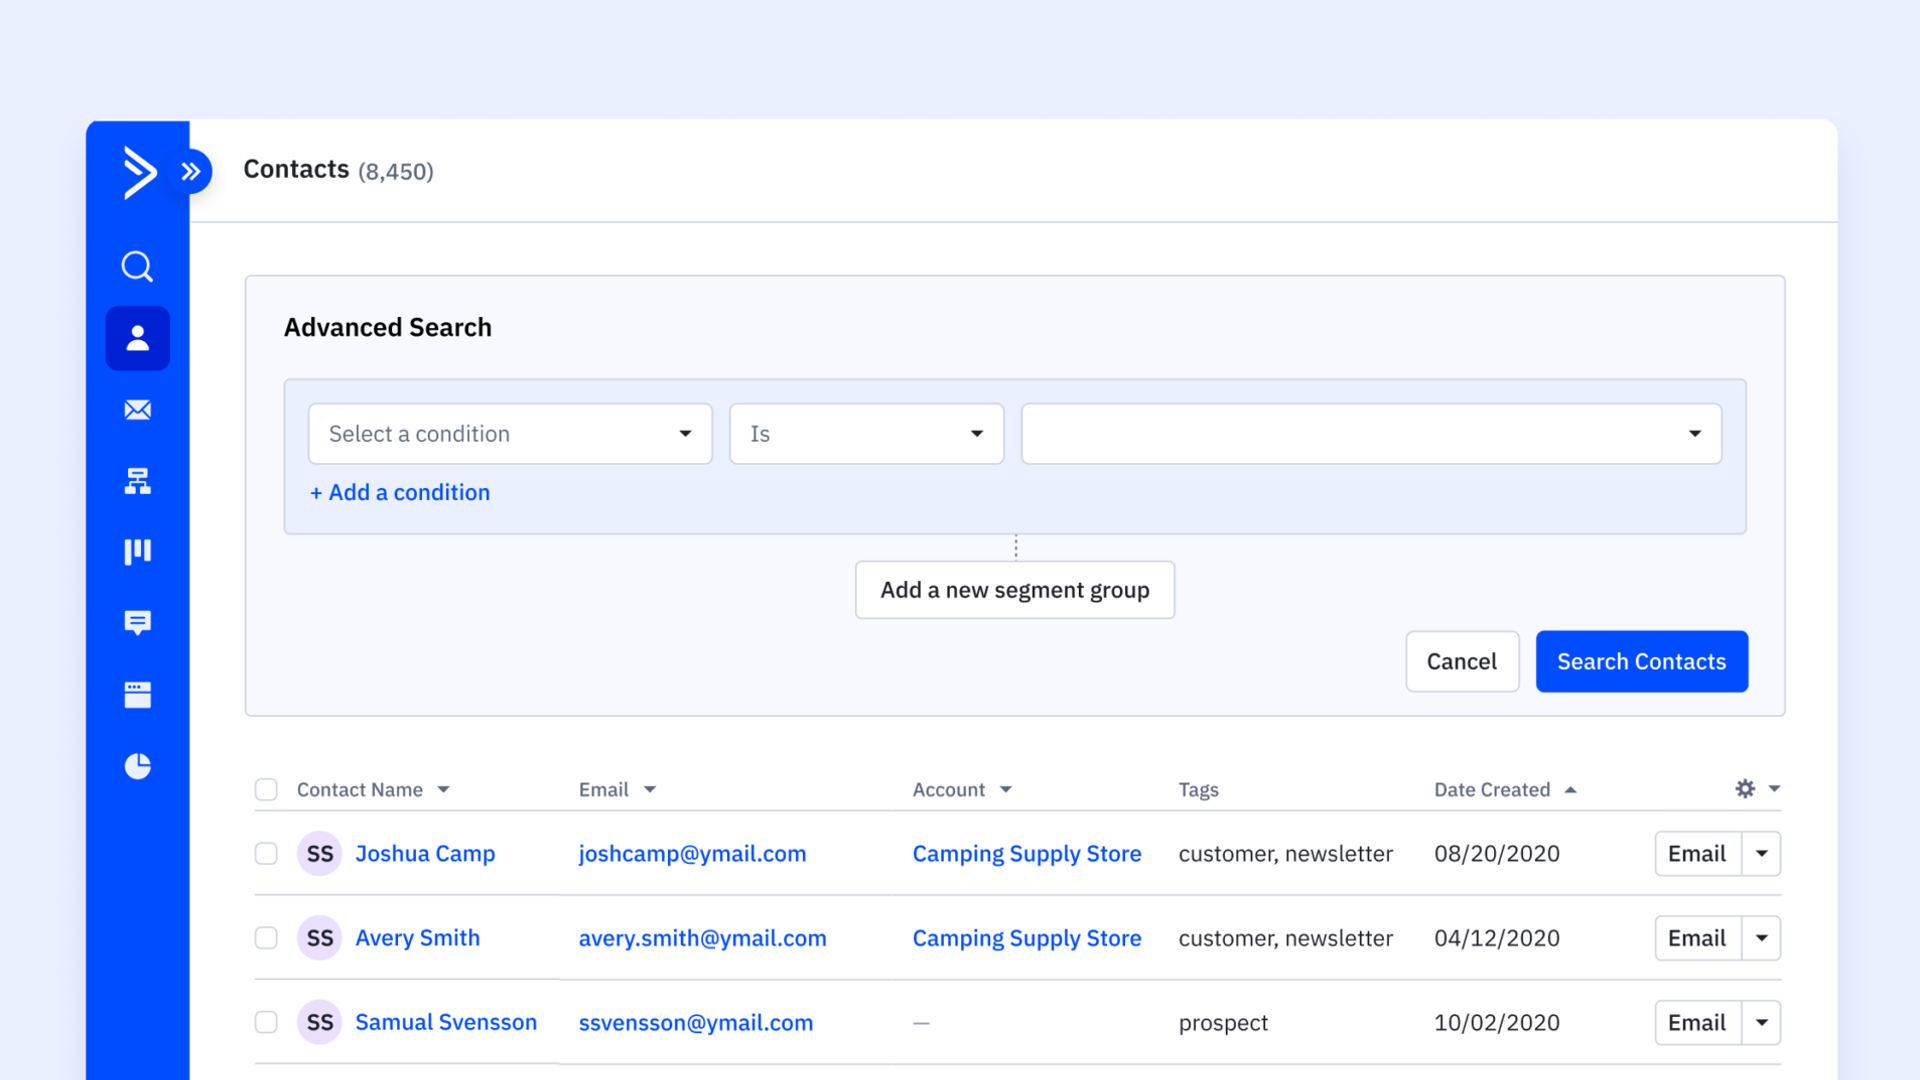
Segmentation is the act of grouping your contacts by either attribute or action. The purpose of segmentation is to bring more personalization into your marketing. Our segment builder is one functionality that truly sets ActiveCampaign apart. In other platforms, the segment builder lives in one place and can only be accessed there. But in ActiveCampaign, our segment builder is a floating feature that allows you to create “segments on the fly” from several different places within the platform.
We are very excited to highlight a collection of high-value features being released over the next quarter as we begin paving the path to evolving your segmentation experience in our platform. Follow along here as we continue to update with new enhancements!
Introducing: Select Multiple Tags Within a Single Condition to Make Room for More Conditions
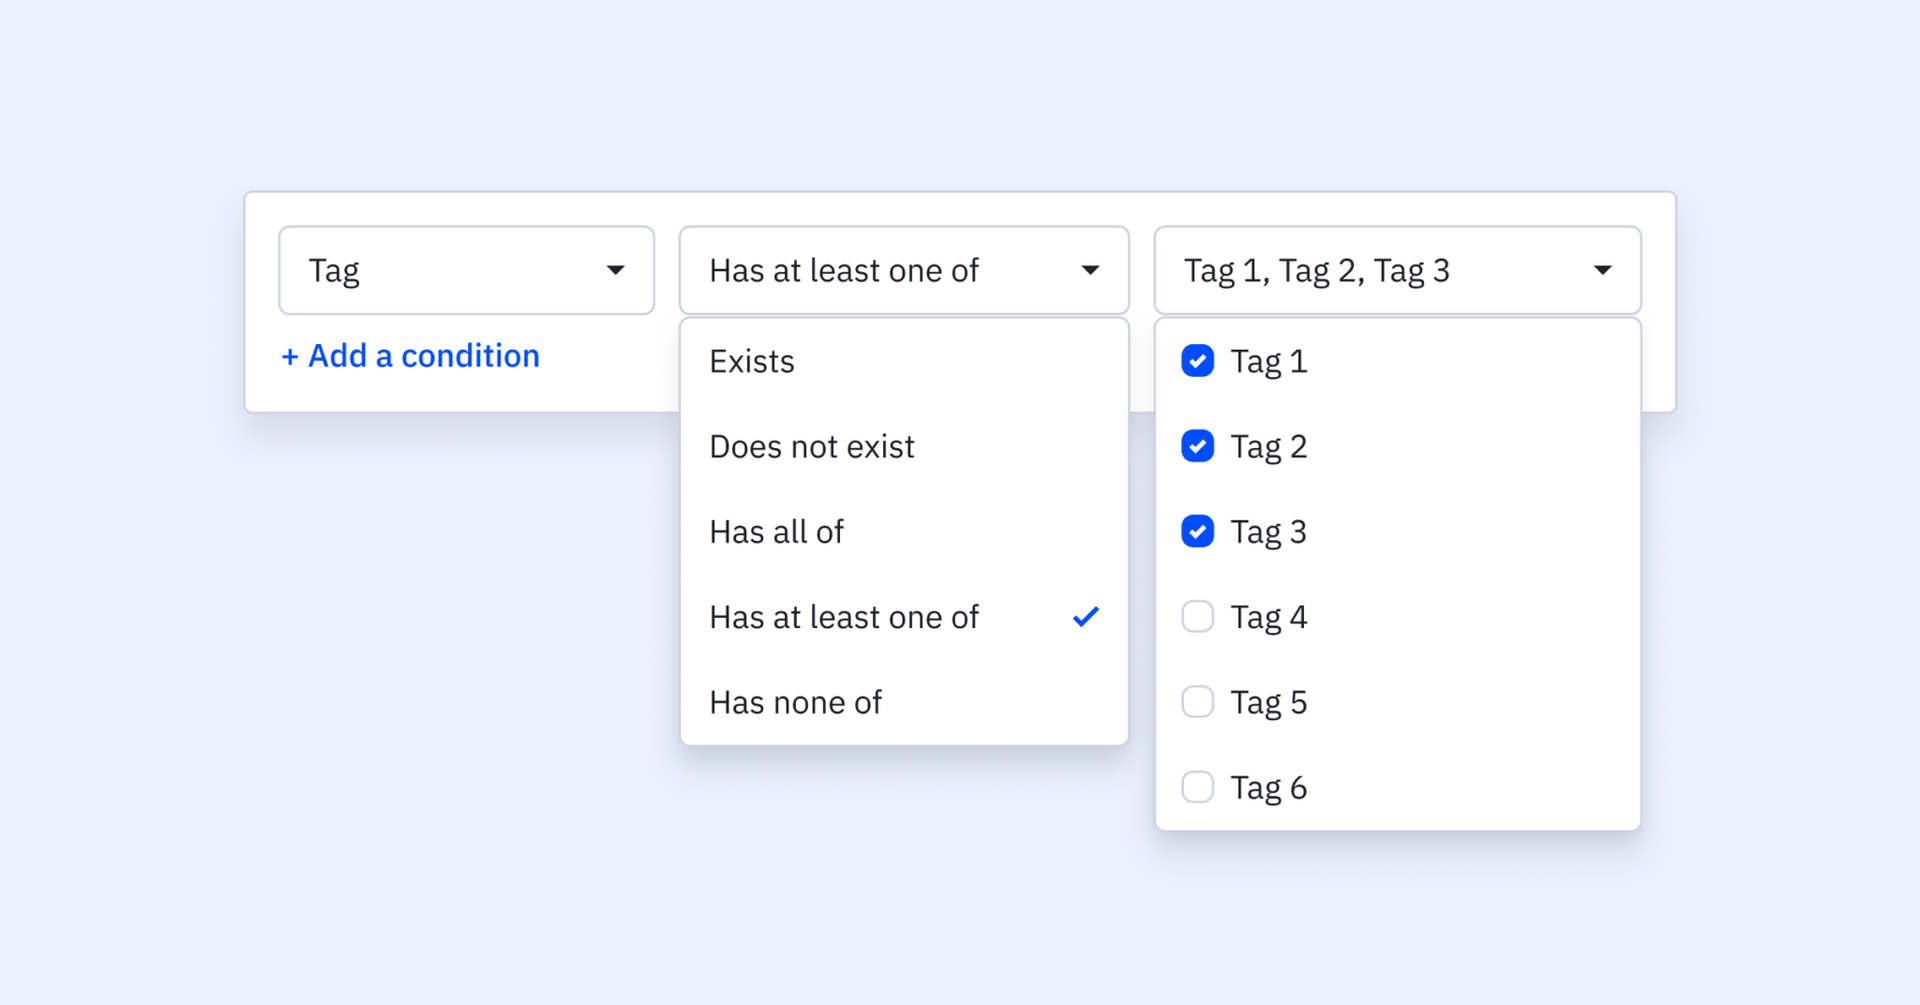
Make room for more conditions! Now, you have the ability to select multiple of your tags from a checkbox dropdown within a single segment condition.
In addition to “tag exists” and “tag does not exist” options, you’ll be armed with a few additional options to help refine your tag segmentation. These Include:
- Matches all of
- Matches any of
- Matches none of
This makes complex tag combinations easier to tackle and increases your ability to target specific contacts with a specific message, faster. See use case examples and more in depth details in our help article below!
Introducing: Segmenting on the Contact List Status Condition
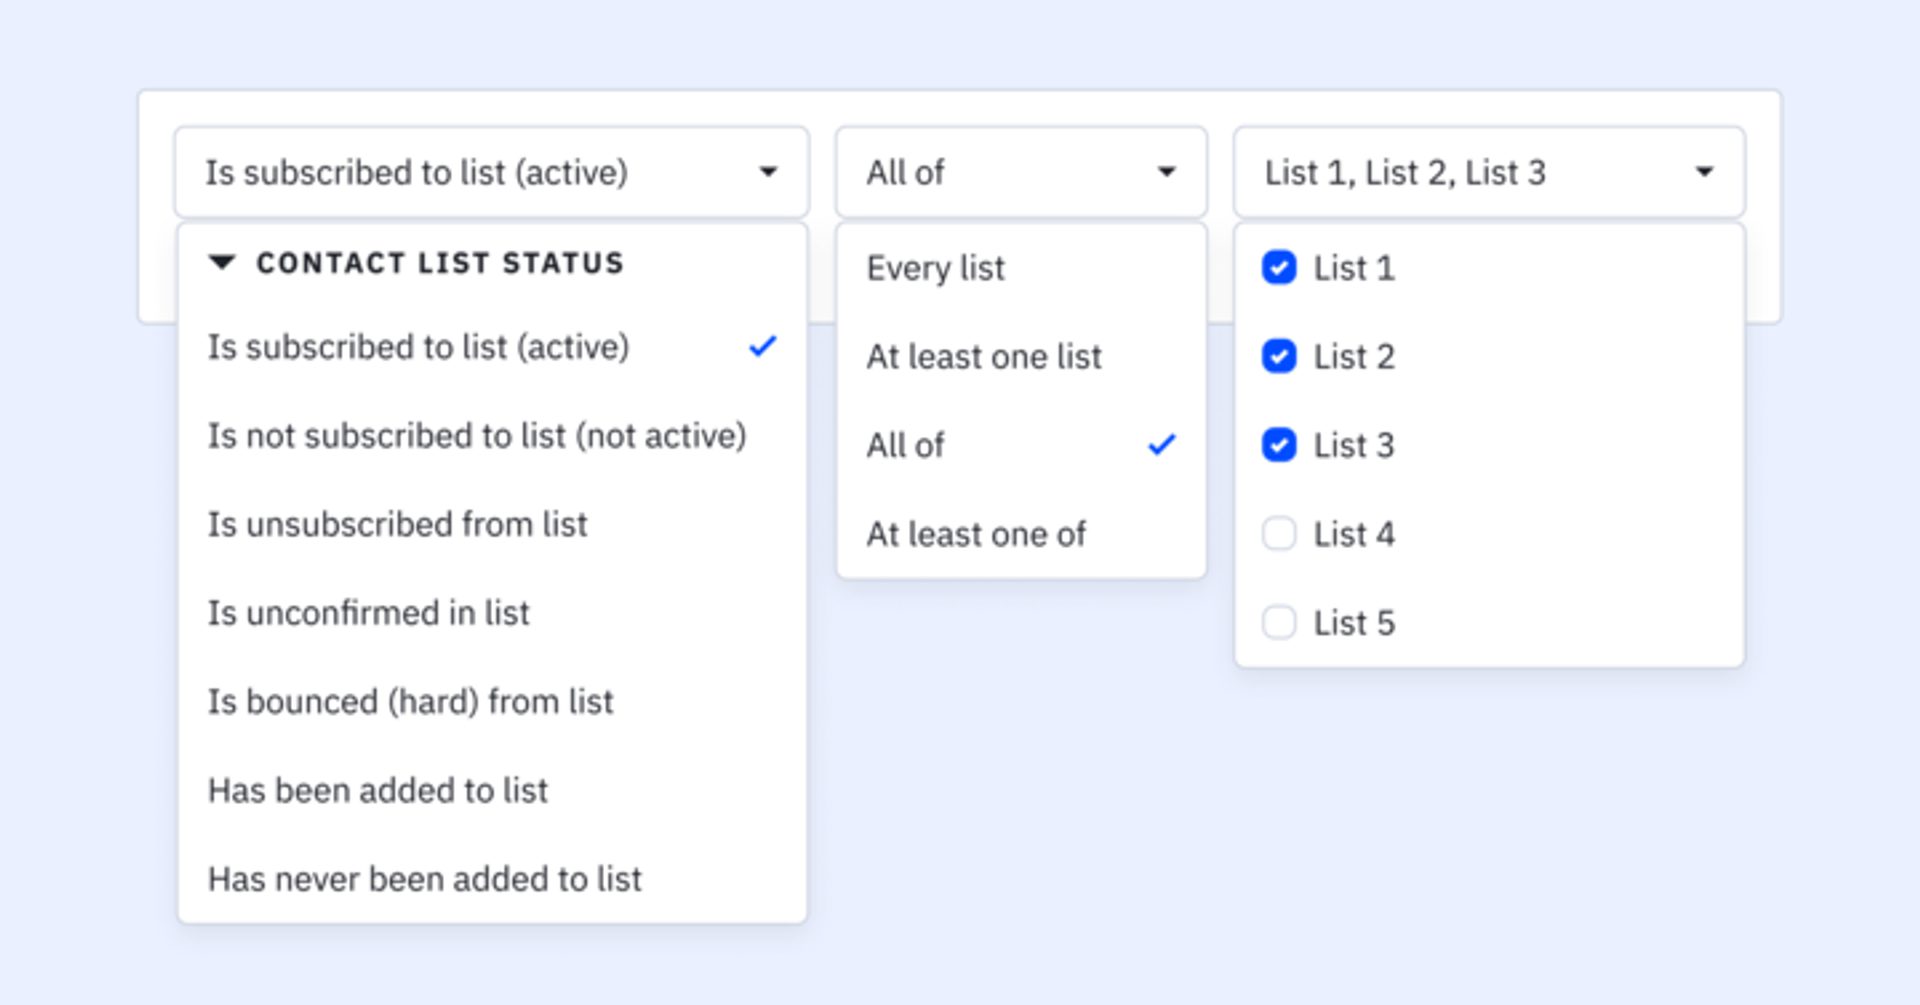
For the first time in ActiveCampaign, you are able to segment on a variety of contact status conditions in relation to your various lists. One of our most common customer requests, looking to segment based on subscribed (active) contact status is now a possibility!
Living under the new “Contact List Status” category in the segment builder, choose from a plethora of contact list status conditions for improved targeting, exclusion and list management efforts.
Notice the conditions you’ve known to be “In list” and “Not in list" have changed to “Is subscribed to list (active)” and “Is not subscribed to list (not active).” This is a simple update to more clearly reflect the meaning of these conditions. In addition to those name changes, you’ll be armed with additional conditions to help refine your contact list status segmentation efforts. These Include:
- Is subscribed to list (active)
- Is not subscribed to list (not active)
- Has unsubscribed from list
- Is unconfirmed in list
- Has bounced (hard) from list
- Has any relationship to list
- Has no relationship to list
Note, these conditions will pair with the options of:
- Every list
- At least one list
- All of <multi-select>
- At least one of <multi-select>
This makes complex relationships between list combinations and contact status approachable. See the help article below for more details and use cases!
Introducing: “Starts With” Segmentation Options
This addition takes your segmentation to a whole new level of precision and efficiency. Using the "Starts with" and "Does not start with" operators along side specific conditions, you can effortlessly match and group specific contacts, accounts and deals with even more precision.
While the existing "contains" operator is a valuable asset, the "Starts with" and “Does not start with” options bring the opportunity of focus and performance to your targeting efforts. By narrowing its search to the very beginning of a text field (with no character limit), it ensures quicker matching and eliminates any accidental matches which could be traditionally found in a “Contains” search.
Most often benefiting those using specific naming conventions at the beginning of your text-based custom field values. This saves you valuable time and allows your segmentation to be more accurate and aligned with your specific requirements.
Introducing: Email Activity Windows
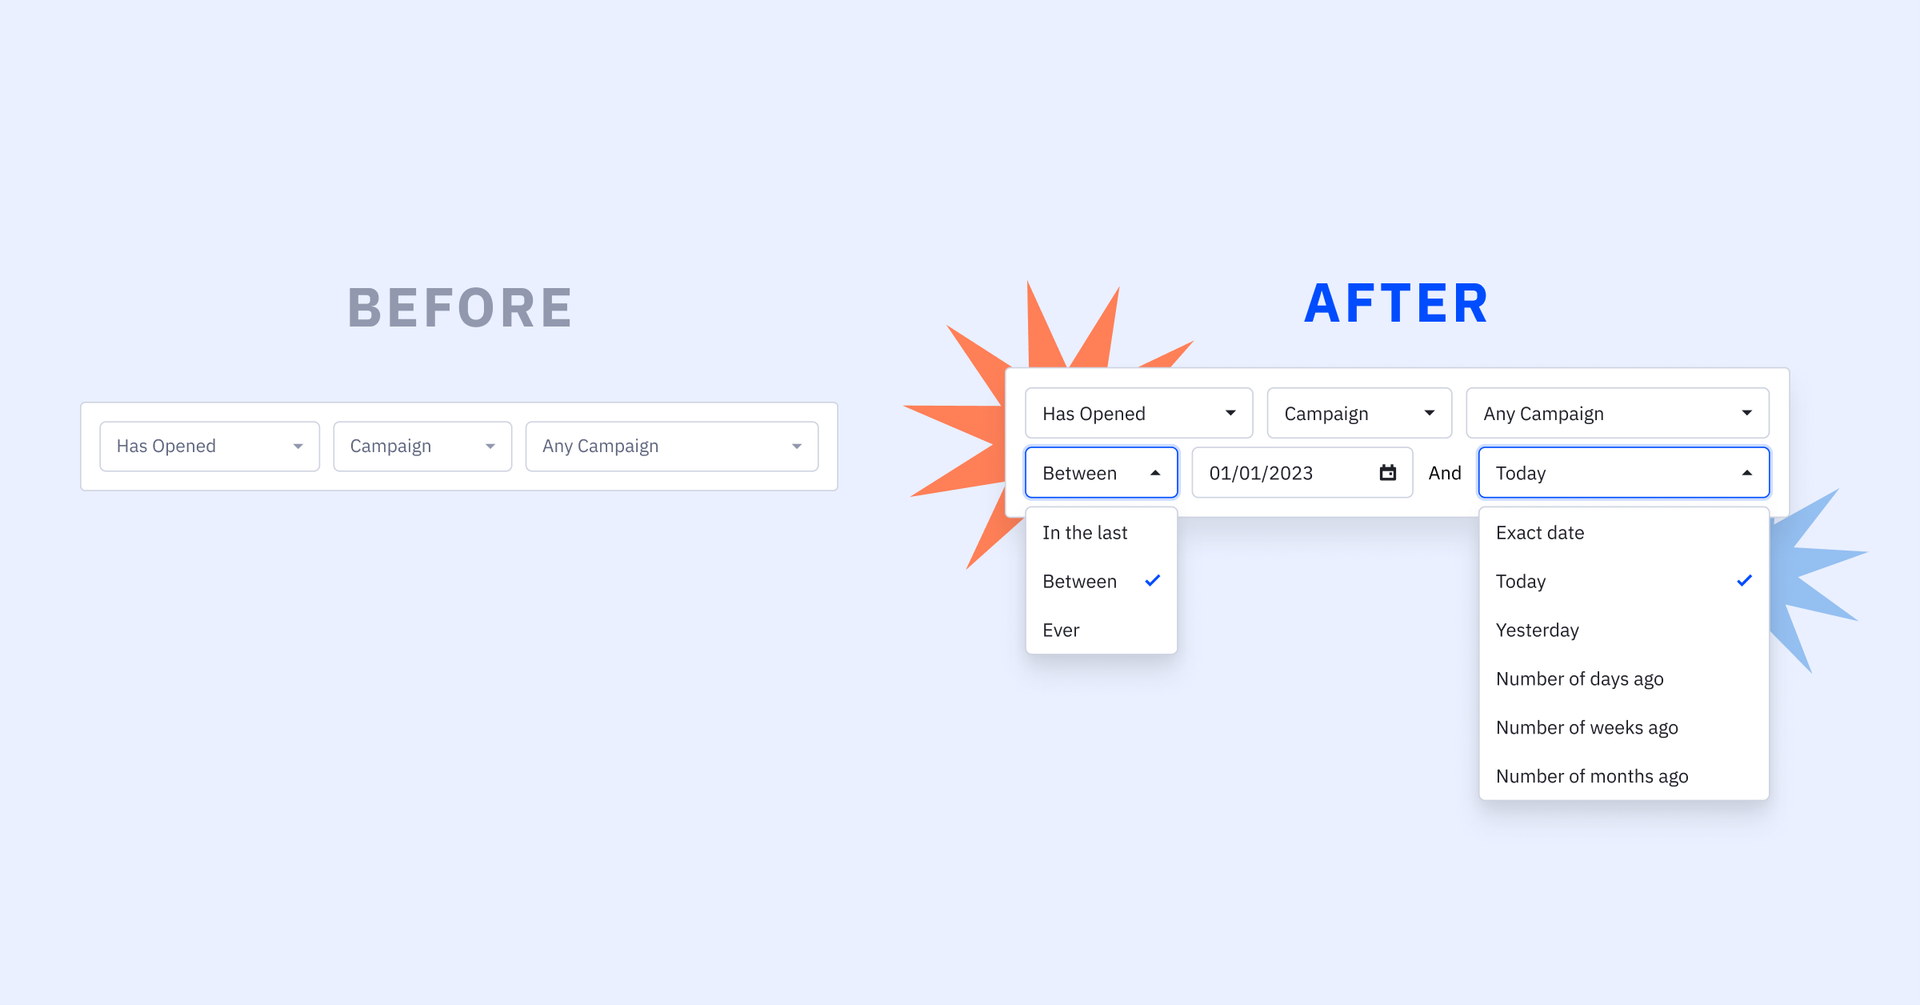
Discover the game-changing potential of ActiveCampaign's email activity windows, empowering you to boost deliverability, ignite engagement, and increase relevancy with data-driven insights for unparalleled email marketing success.
Now, when using the conditions builder in ActiveCampaign you can expect to see email activity conditions for campaigns and 1:1 emails accompanied by customizable windows. Conditions now infused with activity windows for email conditions include:
- Has or Has not opened
- Has or Has not been sent
- Has or Has not clicked on a link
- Has or has not replied
The new activity window operators which will accompany each of the above conditions can include any of the following:
- In the last + days, weeks, months and years (i.e. In the last 25 days)
- Between + exact date [selection], today, yesterday, number of days ago, number of weeks ago and number of months ago (i.e. Between 1/1/22 and Between 1/1/23)
- Ever
Don't just take our word for it, hear from ActiveCampaign Training Specialist at Slick Business, Kay Peacey as she shares her insightful take and use case examples here. For a more technical explanation, read our help article below!
A Look Behind the Product, With Product
We are cooking up something special with our overall segmentation experience. Watch the video below for an exclusive sneak peek into what's coming, what we are thinking about and hear from our product team!