There's no point in driving traffic unless you know what you're doing with it.
There's no point in throwing down an ad budget, running a webinar, or writing a blog article unless it has a clear objective.
And, for most B2B or SaaS businesses with long sales funnels, that objective is lead generation.
There are a variety of avenues you can take to generate leads, but the primary strategy we're all still using is also the simplest: the lead form.
In this article, we'll take a look at the different types of lead forms, show you some real-world examples, and review some of the best practices for creating your own.
First, let’s cover the basics.
What is a lead form, and how does it work?
A lead generation form is an online form used to capture contact information from potential customers.
Lead forms come in a variety of shapes and sizes. You’ve probably seen them scattered across the web (and your competitor's sites).
Have you ever been to a new website, only to be greeted by a pop-up asking for your email address to get 10% off?
That’s a lead form.
The form captures your lead data and stores it in a CRM or marketing platform.
As a result, businesses can define the buyer journey and nurture a lead into a customer.
What are the types of leads?
Let’s clarify the types of leads:
- Marketing qualified lead (MQL) - A lead who could become a customer if nurtured correctly. MQLs are identified based on the web pages they’ve visited, their behavior on your site, and any other way they’ve engaged with your content.
- Sales qualified lead (SQL) - A prospective customer that’s expressed enough interest in your product or service to move into the sales process. These are usually passed to the sales team from the marketing department.
- Product qualified lead (PQL) - A potential customer that has used your product or service and has a high chance of becoming a paying customer.
Types of lead forms and examples of each
Now let’s take a look at the types of lead forms and how they work.
And don’t worry, we’ve got some examples lined up to inspire you.
1. Inline forms
First on our list is inline forms.
These forms are embedded into the content of the webpage. Whether that’s a contact page or a landing page, inline forms can go pretty much anywhere on your website.
Inline forms are flexible in their approach. They can collect a variety of information, giving you the ability to add, change, or remove fields that appear on the form.
This demo-request form from Thinqi is a perfect example:

In addition to name and email, leads also are asked to provide their company name and size. These details allow Thinqi to better understand their leads.
They also can use this information to inform their marketing strategy going forward, making sure that they provide their consumers with the best experience possible.
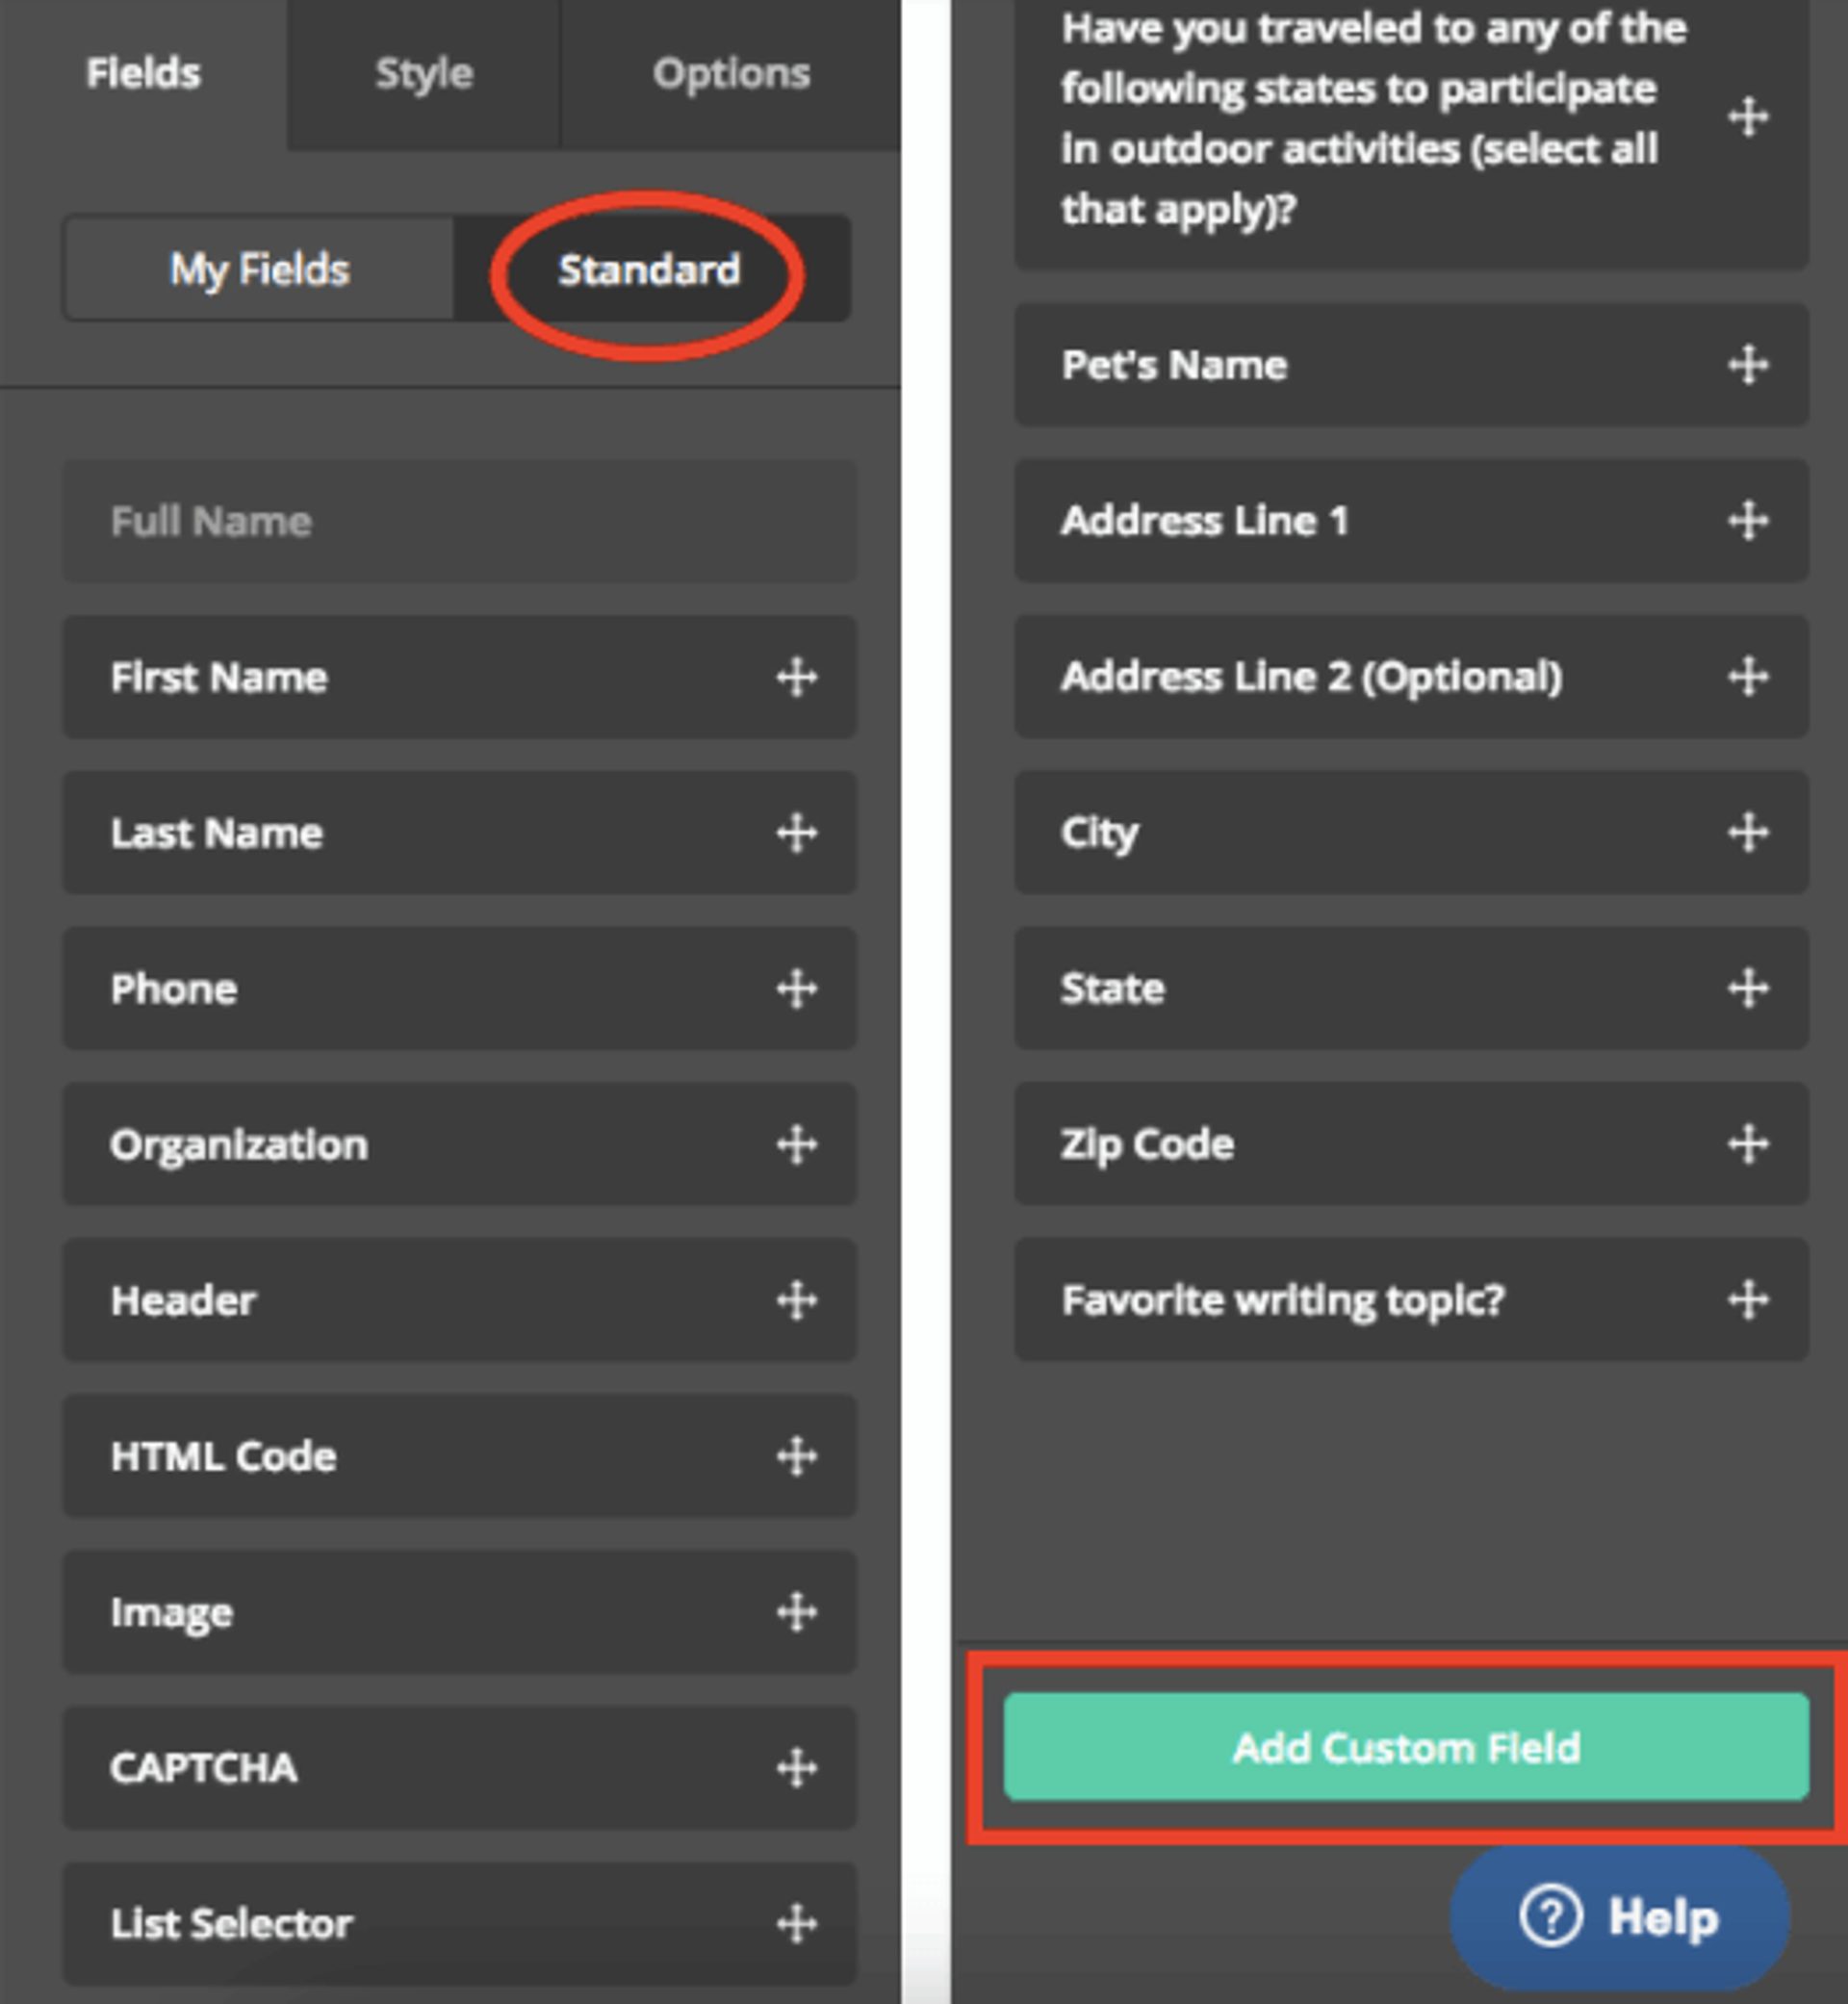
When it comes to creating an inline form, think about what information you’d like to capture.
Perhaps you want to know what city your new lead is from? Or their age? Or maybe you need to find out more about their online shopping behavior?
Whatever the question is, make sure you use a lead form builder that provides a certain level of customization.
With ActiveCampaign, you can add custom fields to your inline forms to ensure you capture all the desired information.
2. Floating bar form
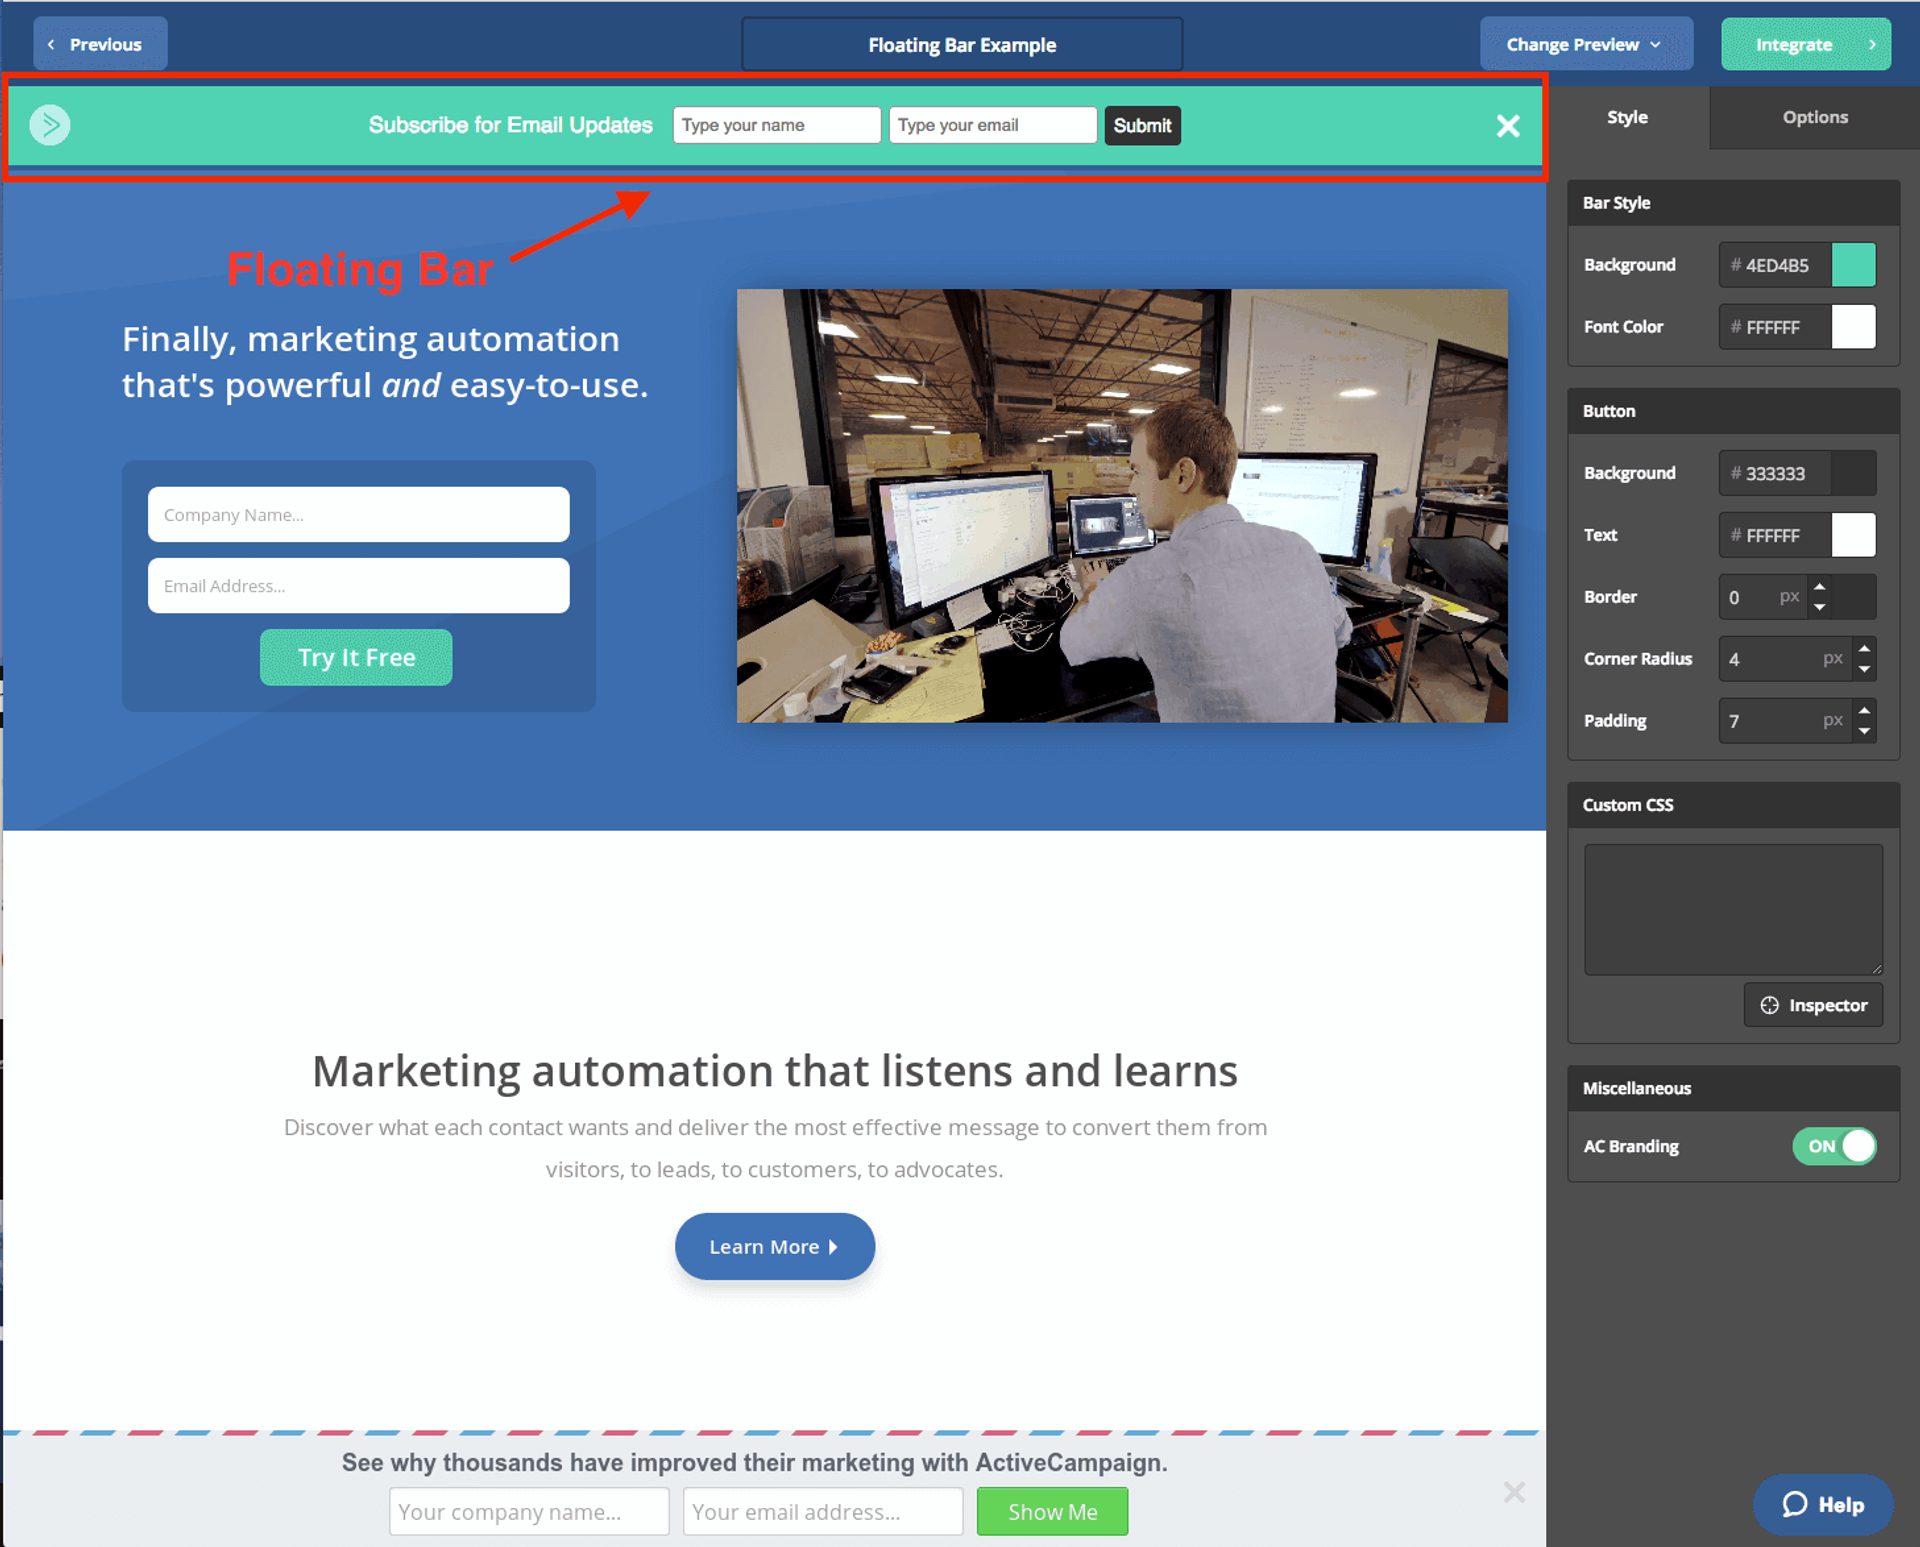
The floating bar form stays at the top or bottom of a webpage, even while your visitors scroll. These forms are generally used for capturing email addresses.
They typically have one or two fields for customers to complete.
We have a floating bar form on our website:

As you can see, we’ve opted for a single-form field.
In ActiveCampaign, the "name" and "email address" fields automatically populate to save you time.
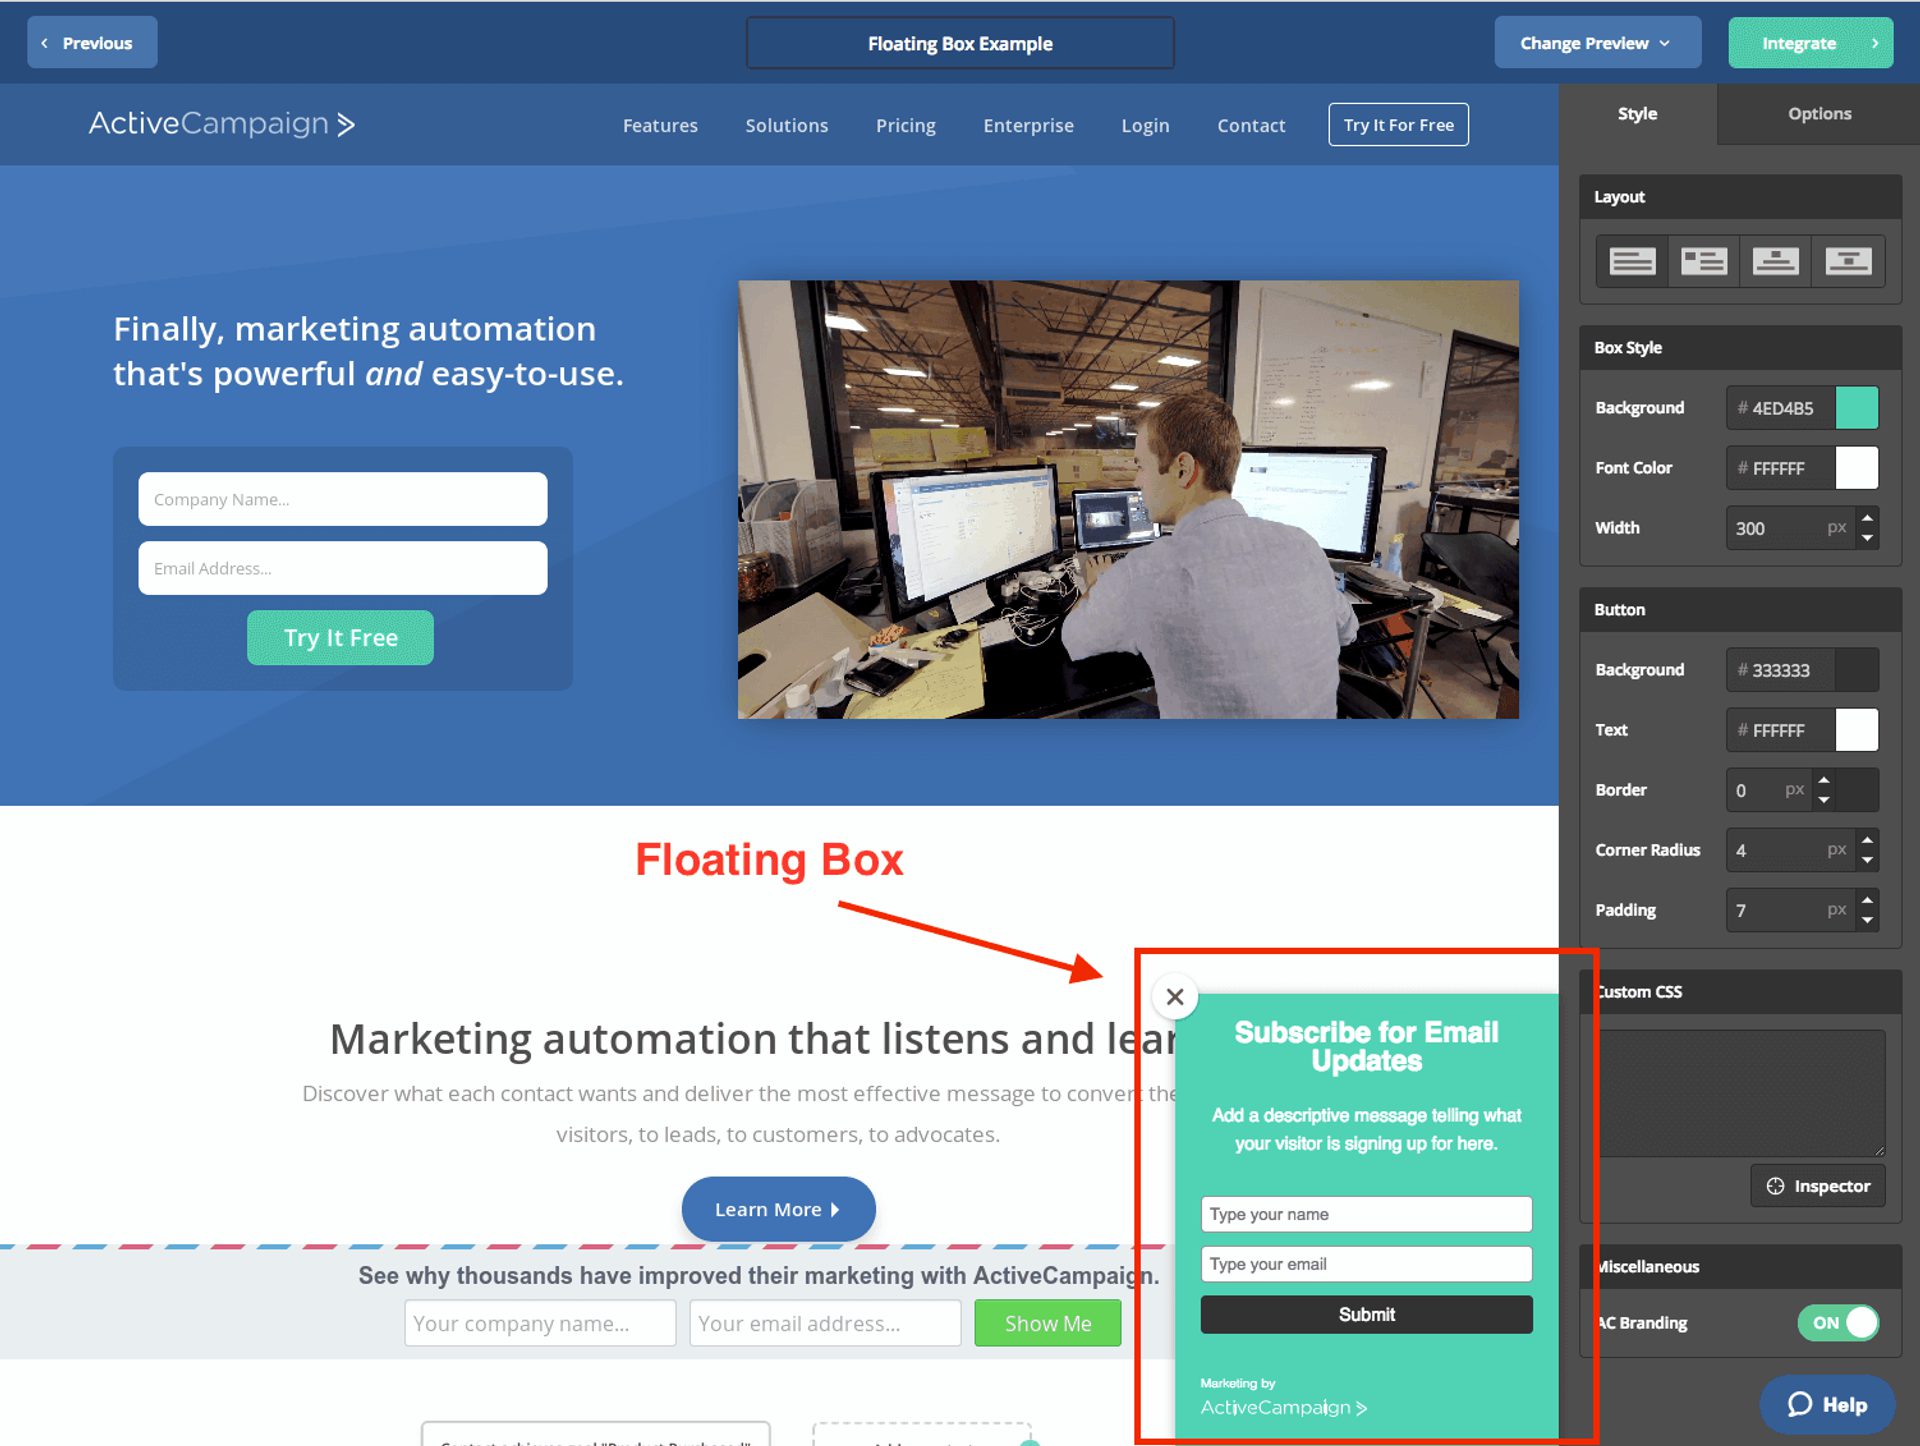
3. Floating box form
Like the floating bar form, the floating box form will sit (or float) on a webpage and stay in place while visitors scroll. It’s usually located in the bottom right corner of the screen.
Because of its slightly larger layout, you have more flexibility to add more form fields. Or you can keep it short and sweet, just like this form from Contest Domination:
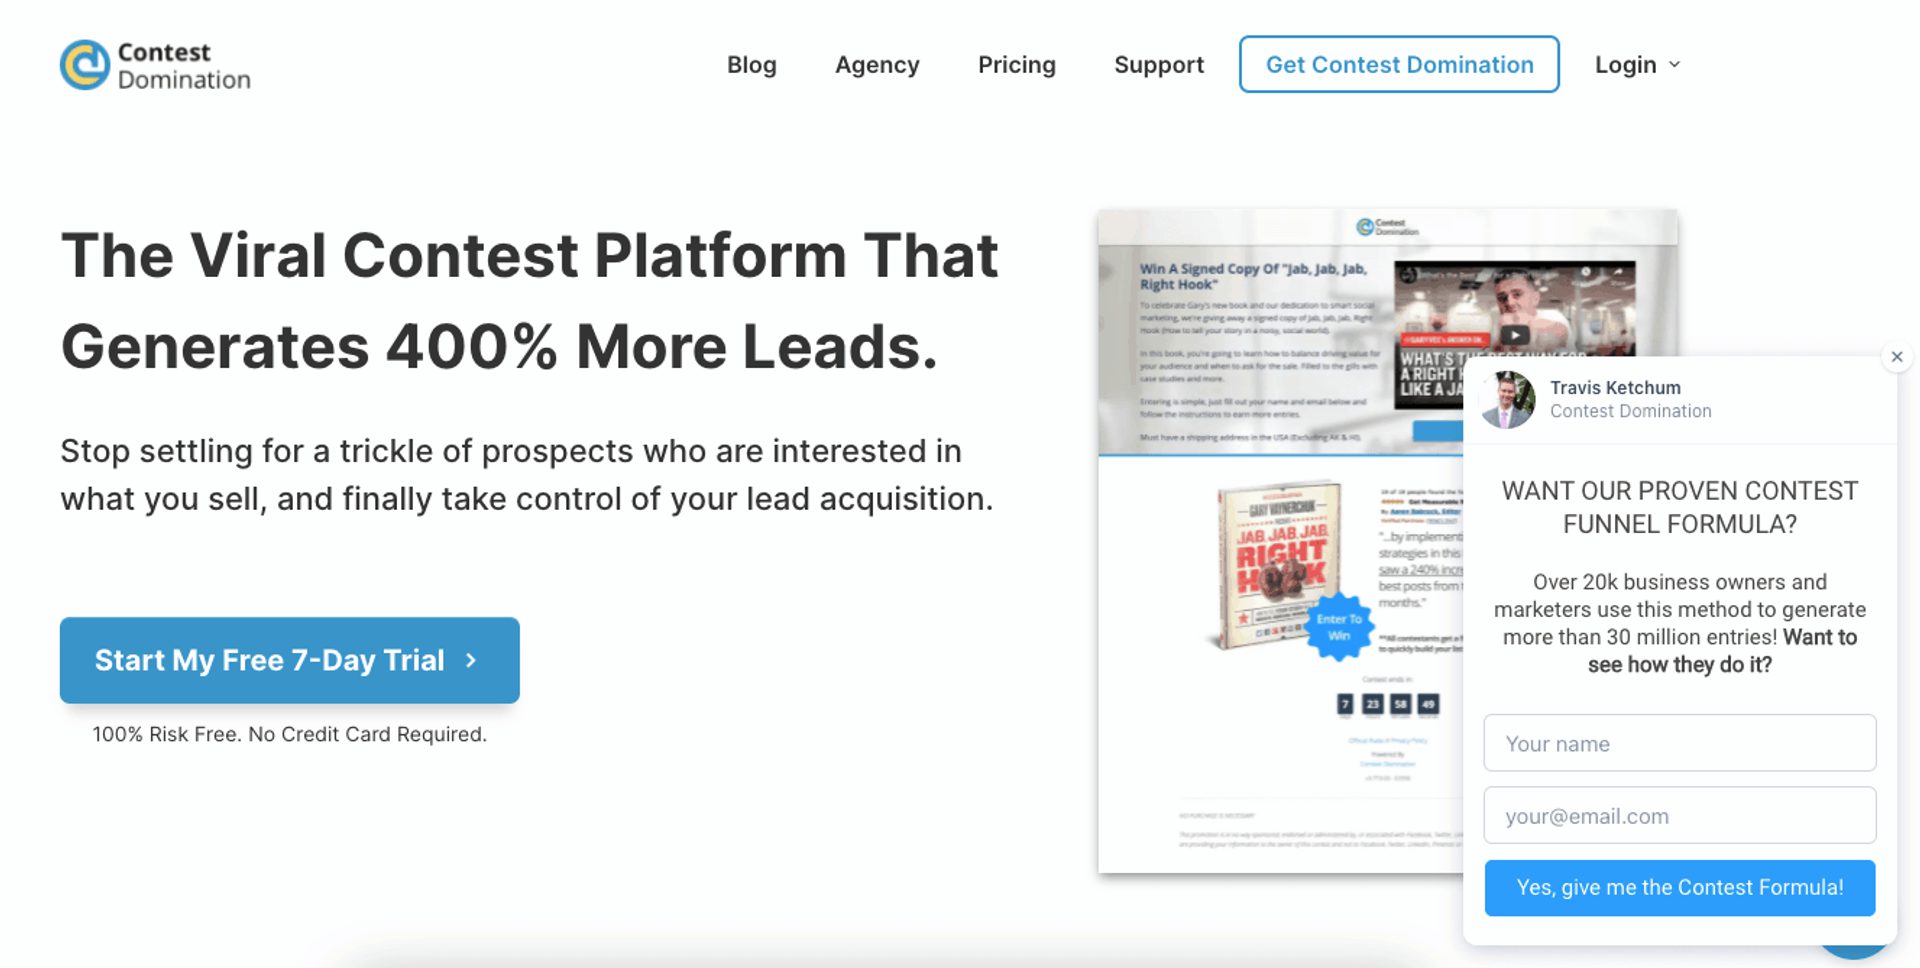
These forms generally appear as soon as a user lands on the page, but with some platforms, you can specify when the box should appear.
You also can choose whether the box displays in the right or left corner of your website and opt to make certain fields required.
You can customize the box exactly how you like — whether that’s changing the color, style, or adding your logo design.
4. Modal form
The modal form is a pop-up. It appears as visitors are browsing the page, encouraging them to submit their information.
Here’s the modal form that users see when they visit Smart Insights.
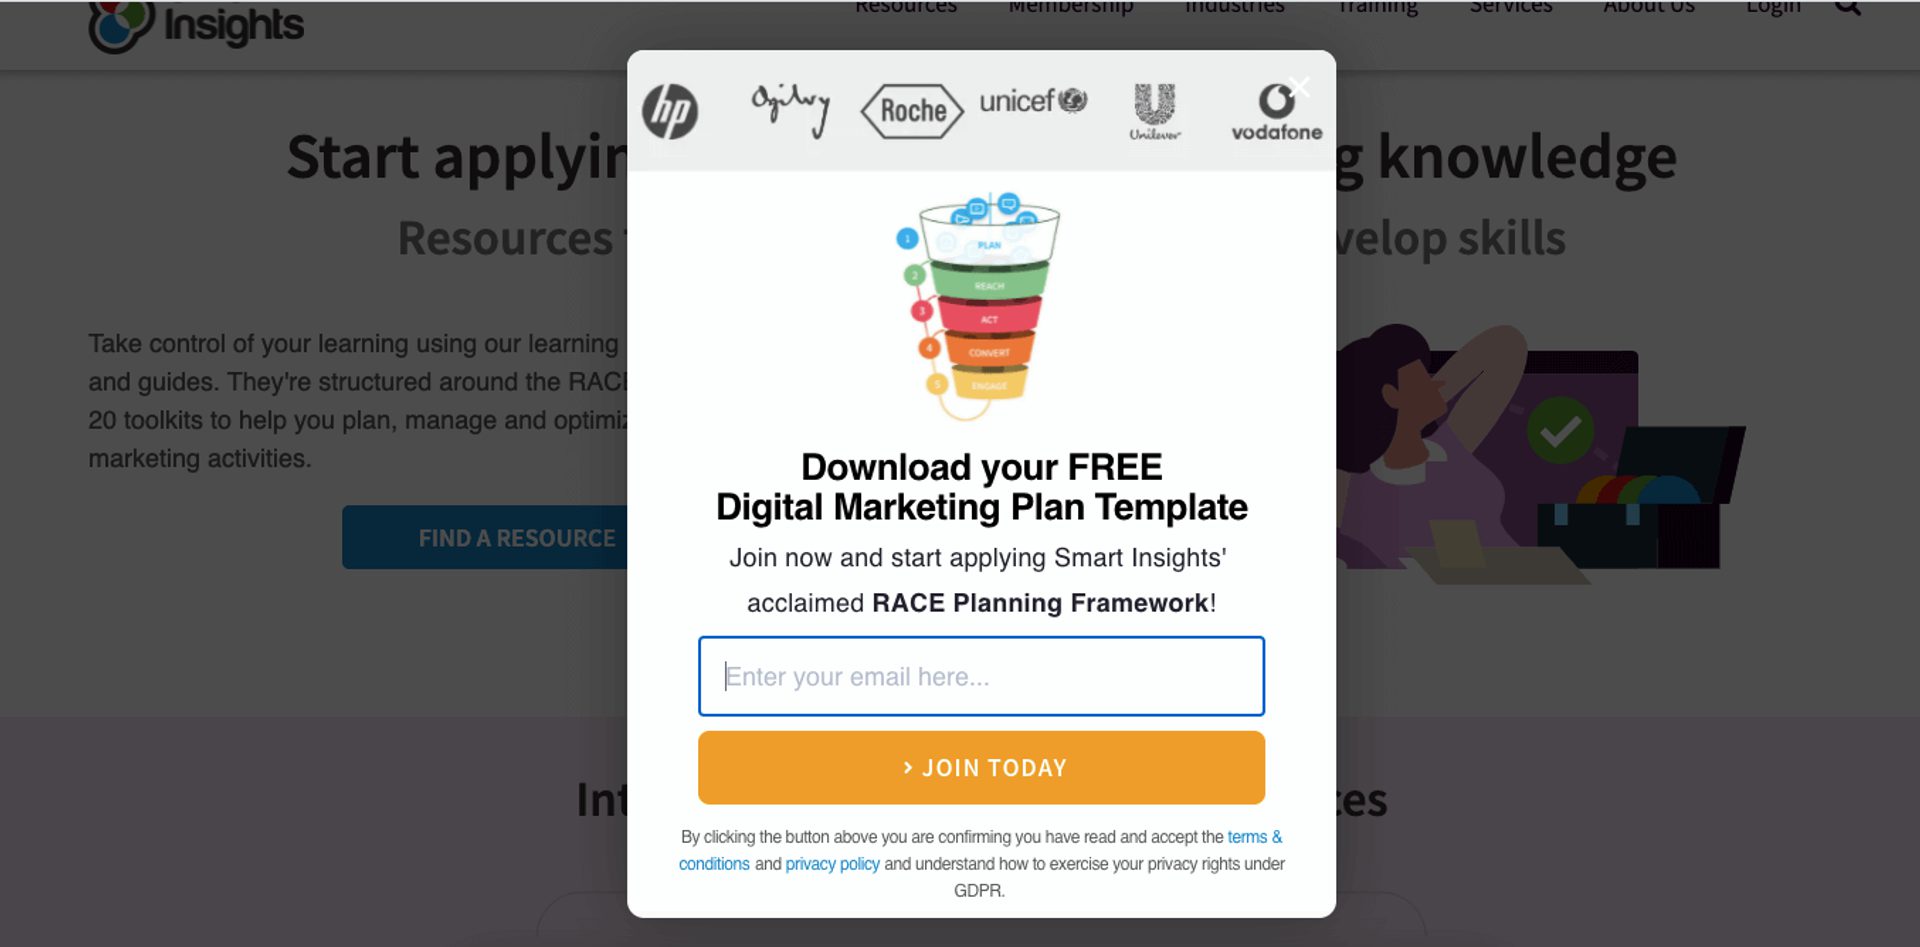
This form pops up on their “free guides and templates" page shortly after landing on it. It incentivizes visitors to provide their contact email to get a free marketing template.
You can’t view the rest of the page until you’ve provided your information or closed the pop-up.
Marketers have reservations about the impact these pop-ups have on the customer experience and whether they might deter a potential client from staying on the site.
But there’s a reason so many people continue to use them.
Modal forms often have conversion rates of around 2%, which is significantly higher than most social ads.
The invasive nature of this form can work in your favor, especially if it offers the consumer something valuable in return (we’ll talk more about incentivizing your forms later).
So if you decide to use a modal form, make sure you give your visitor a reason to fill it in and not click that little X at the top right.
With ActiveCampaign modal forms, you can edit the description to inform your visitors of exactly what they’re signing up for.
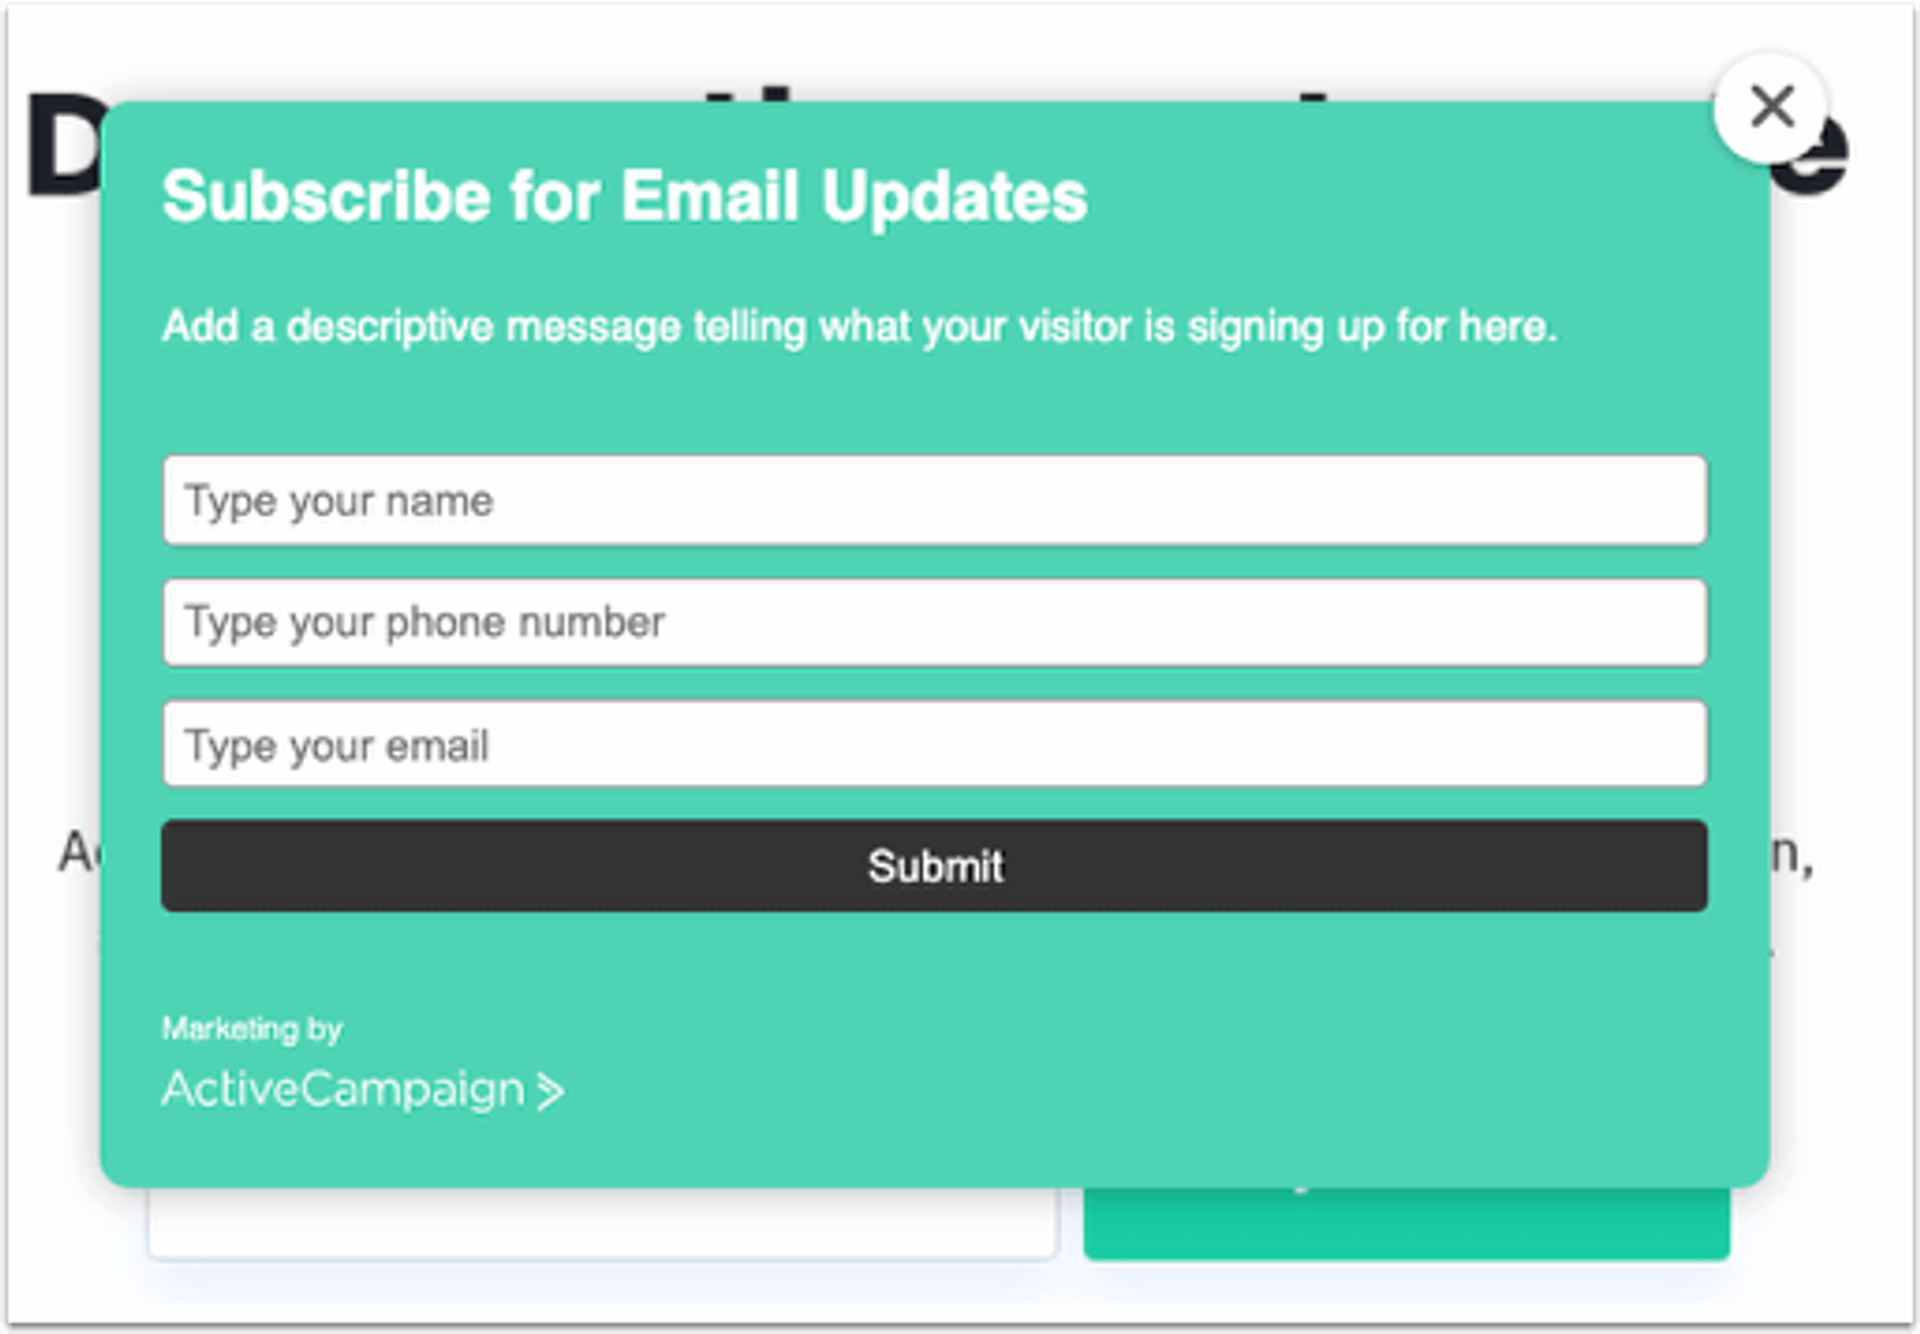
Learn more about the types of forms you can create with ActiveCampaign.
How to optimize your lead form
Lead form optimization allows you to create a form that’s best suited for your target audience.
And although every business is different, there are some optimizations everyone can use to increase their chances of getting leads.
Fortunately for you, we’ve outlined 5 of these best practices. So let’s take a look at how you can encourage visitors to fill out your forms.
1. Incentivize completion of your form
Incentivizing your form is an effective way to encourage visitors to provide their information.
For example, My Wine Canada offers a 10% discount to visitors who provide their emails:
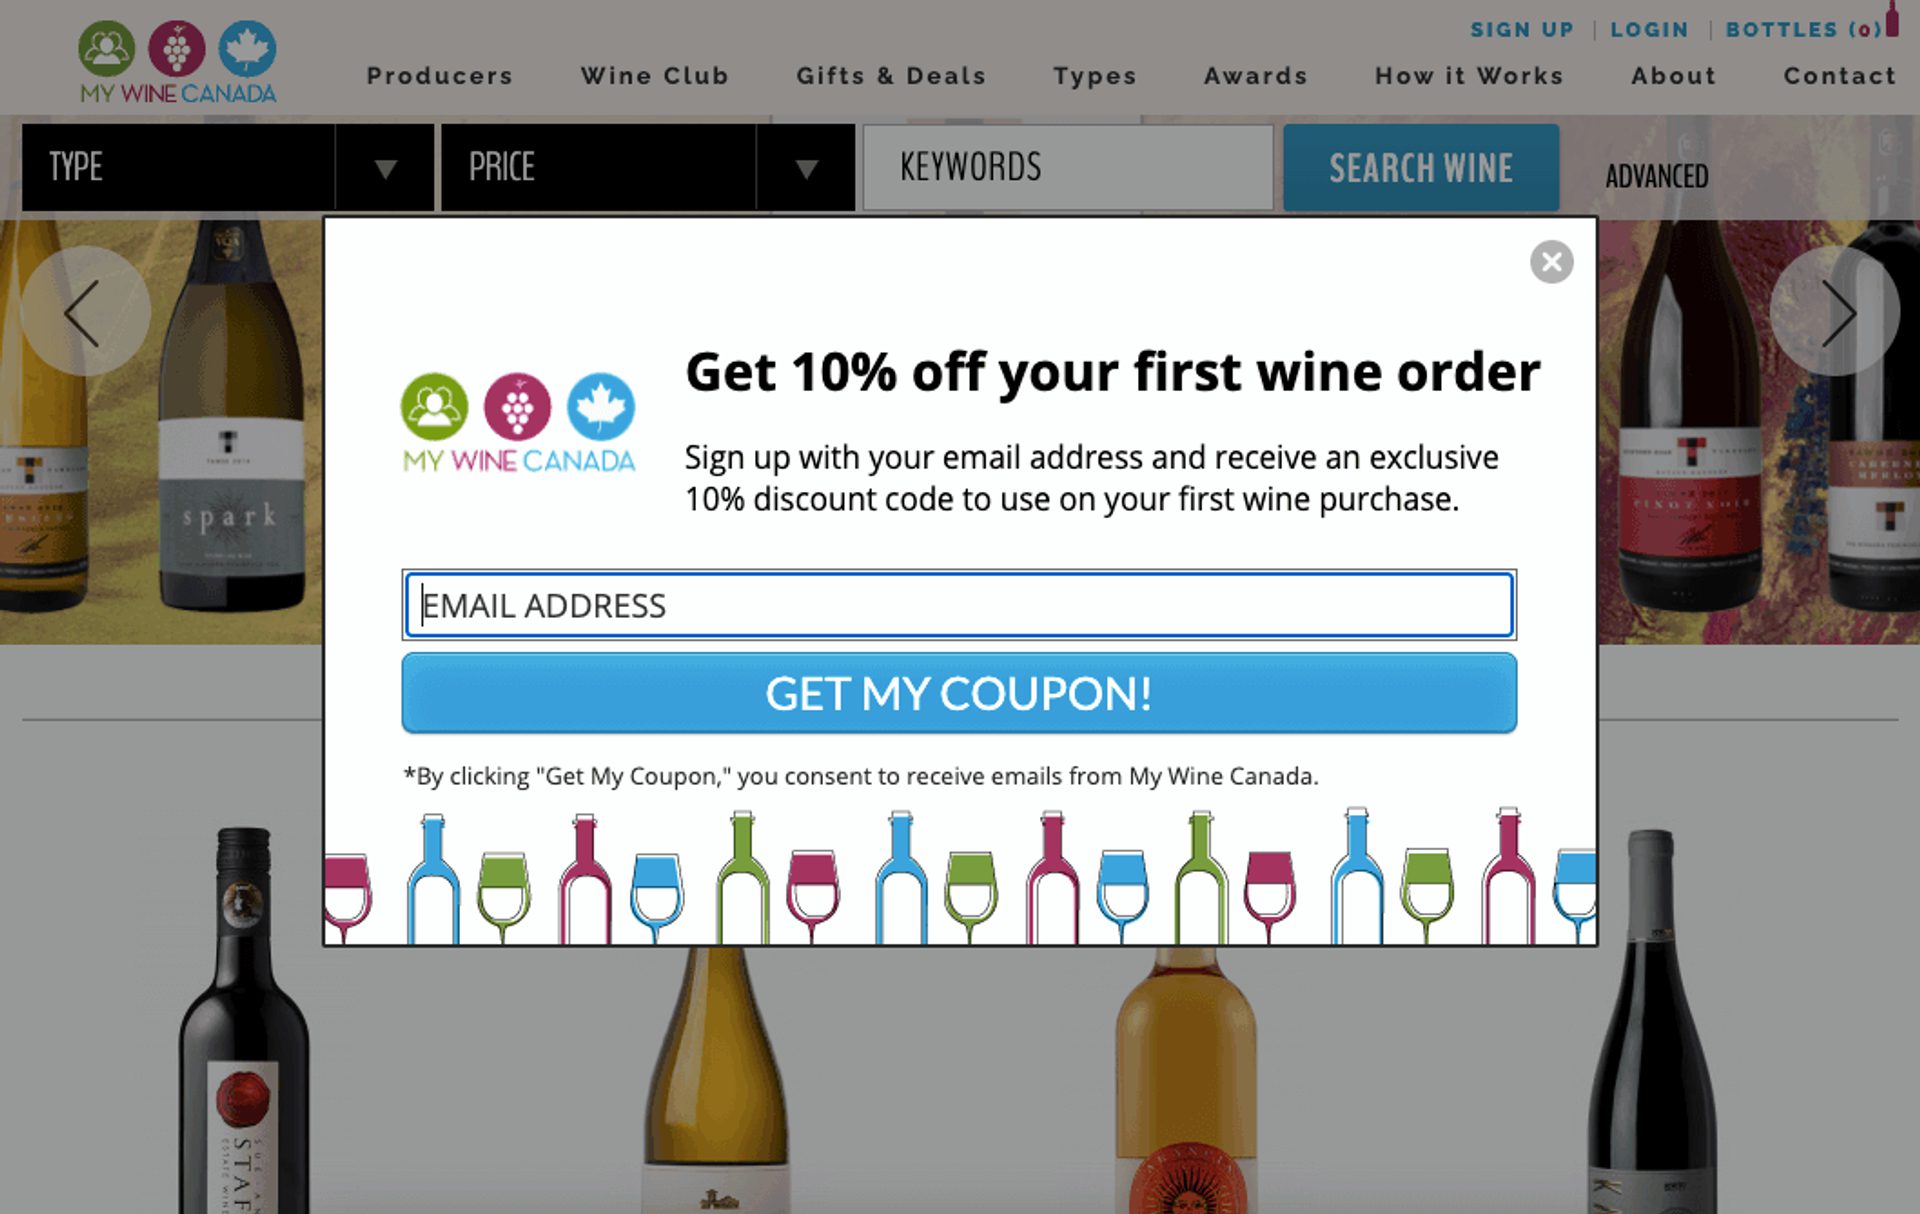
And given that 92% of online shoppers seek out a discount before purchasing, offering a discount is a good way to go.
But there are endless ways you can incentivize your lead forms. it doesn’t always have to be a discount code.
You could provide access to eBooks, white papers, or an online course.
So long as you’re providing something valuable, you’re likely to get more interest from a potential customer.
2. Keep your form above the fold
You want your forms to be as clear and visible as possible from the moment a person visits your page. And the best way to do that is to keep your form above the fold.
Take a look at Falcon, for example.
Their demo page displays an inline form that’s visible as soon as you land on the page:
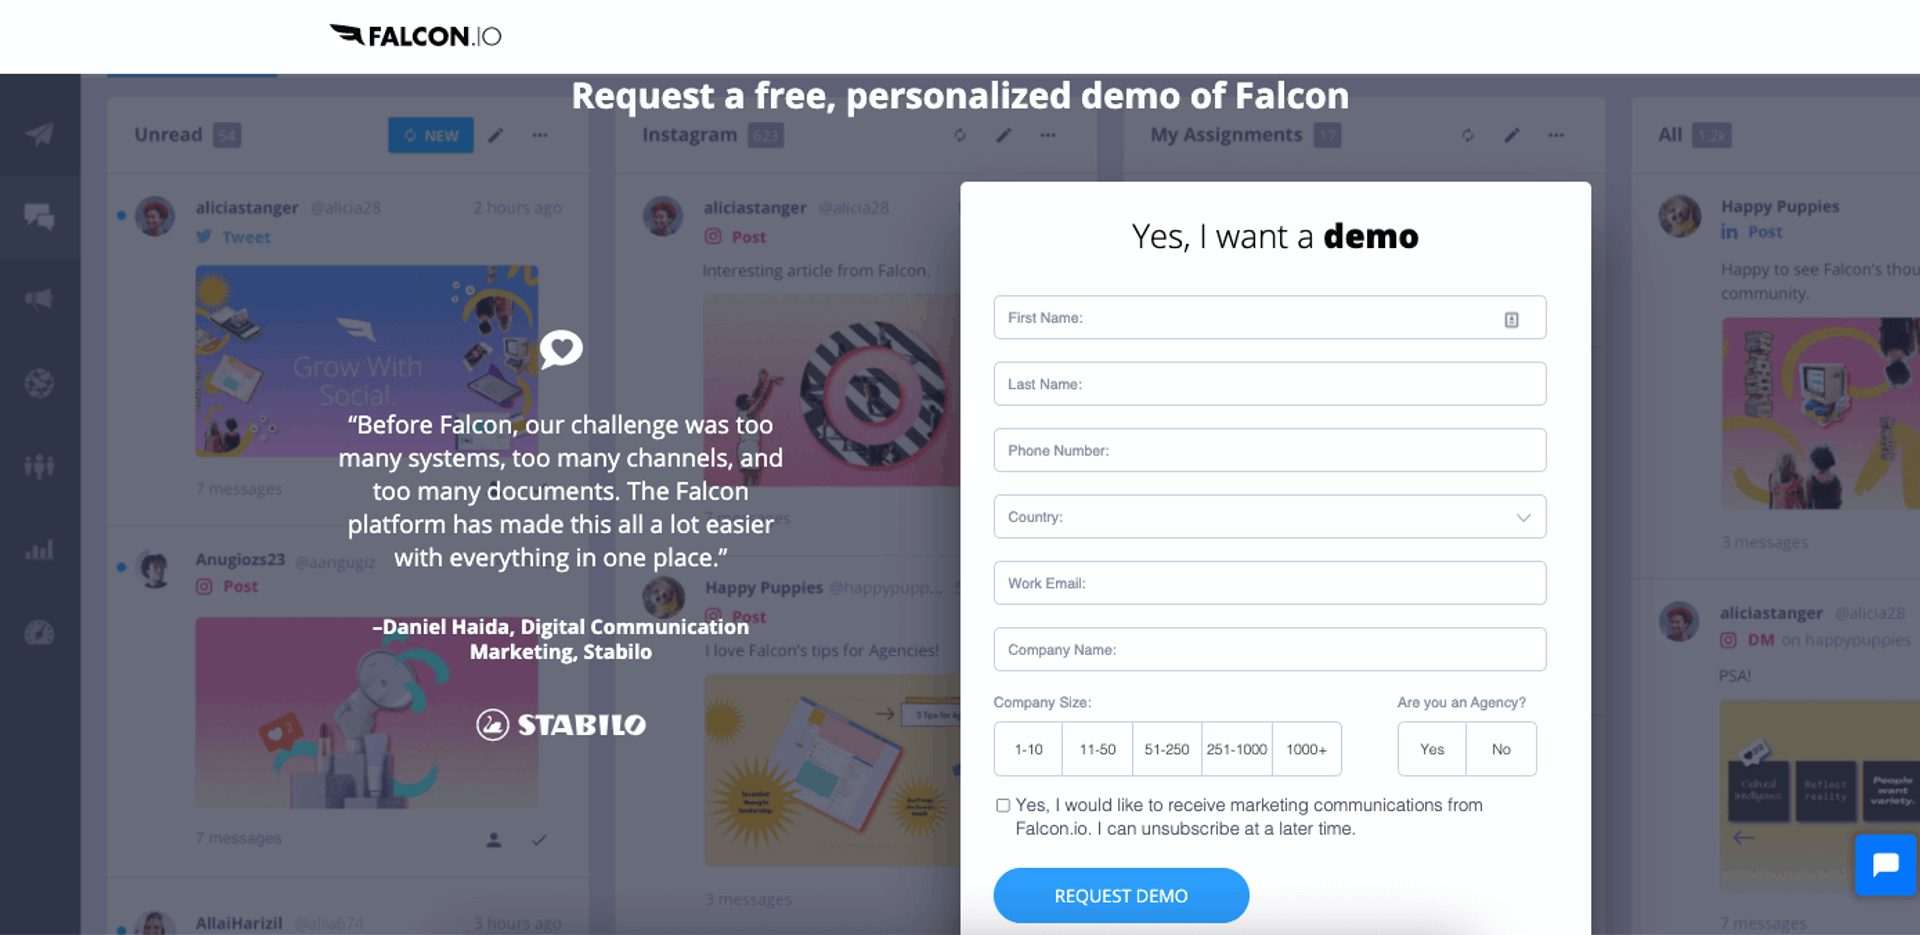
It’s hard to miss, right? And that’s the point.
By having the form embedded in plain sight, visitors can quickly complete the form submission.
3. Keep it relevant
You should only provide visitors with a web form when it’s relevant to do so.
This means showing them the right information at the right time. That way, you’re more likely to get them to fill in the form.
Let’s use the Smart Insights example again.
When you click on the "free guides and templates" page, a form appears. It provides visitors with access to a free marketing template if they provide their email.
It wouldn’t make as much sense for a pop-up to appear offering a discount for a paid toolkit, especially if the visitor is searching for free content.
4. Refine your call-to-action
Your call-to-action (CTA) plays an important part in encouraging visitors to send you their information.
Here are some tips for making sure your CTAs do their job as well as possible.
- Use instructive language: Tell your visitor what you want them to do. "Click," "buy," and "Try for free" are all great places to start.
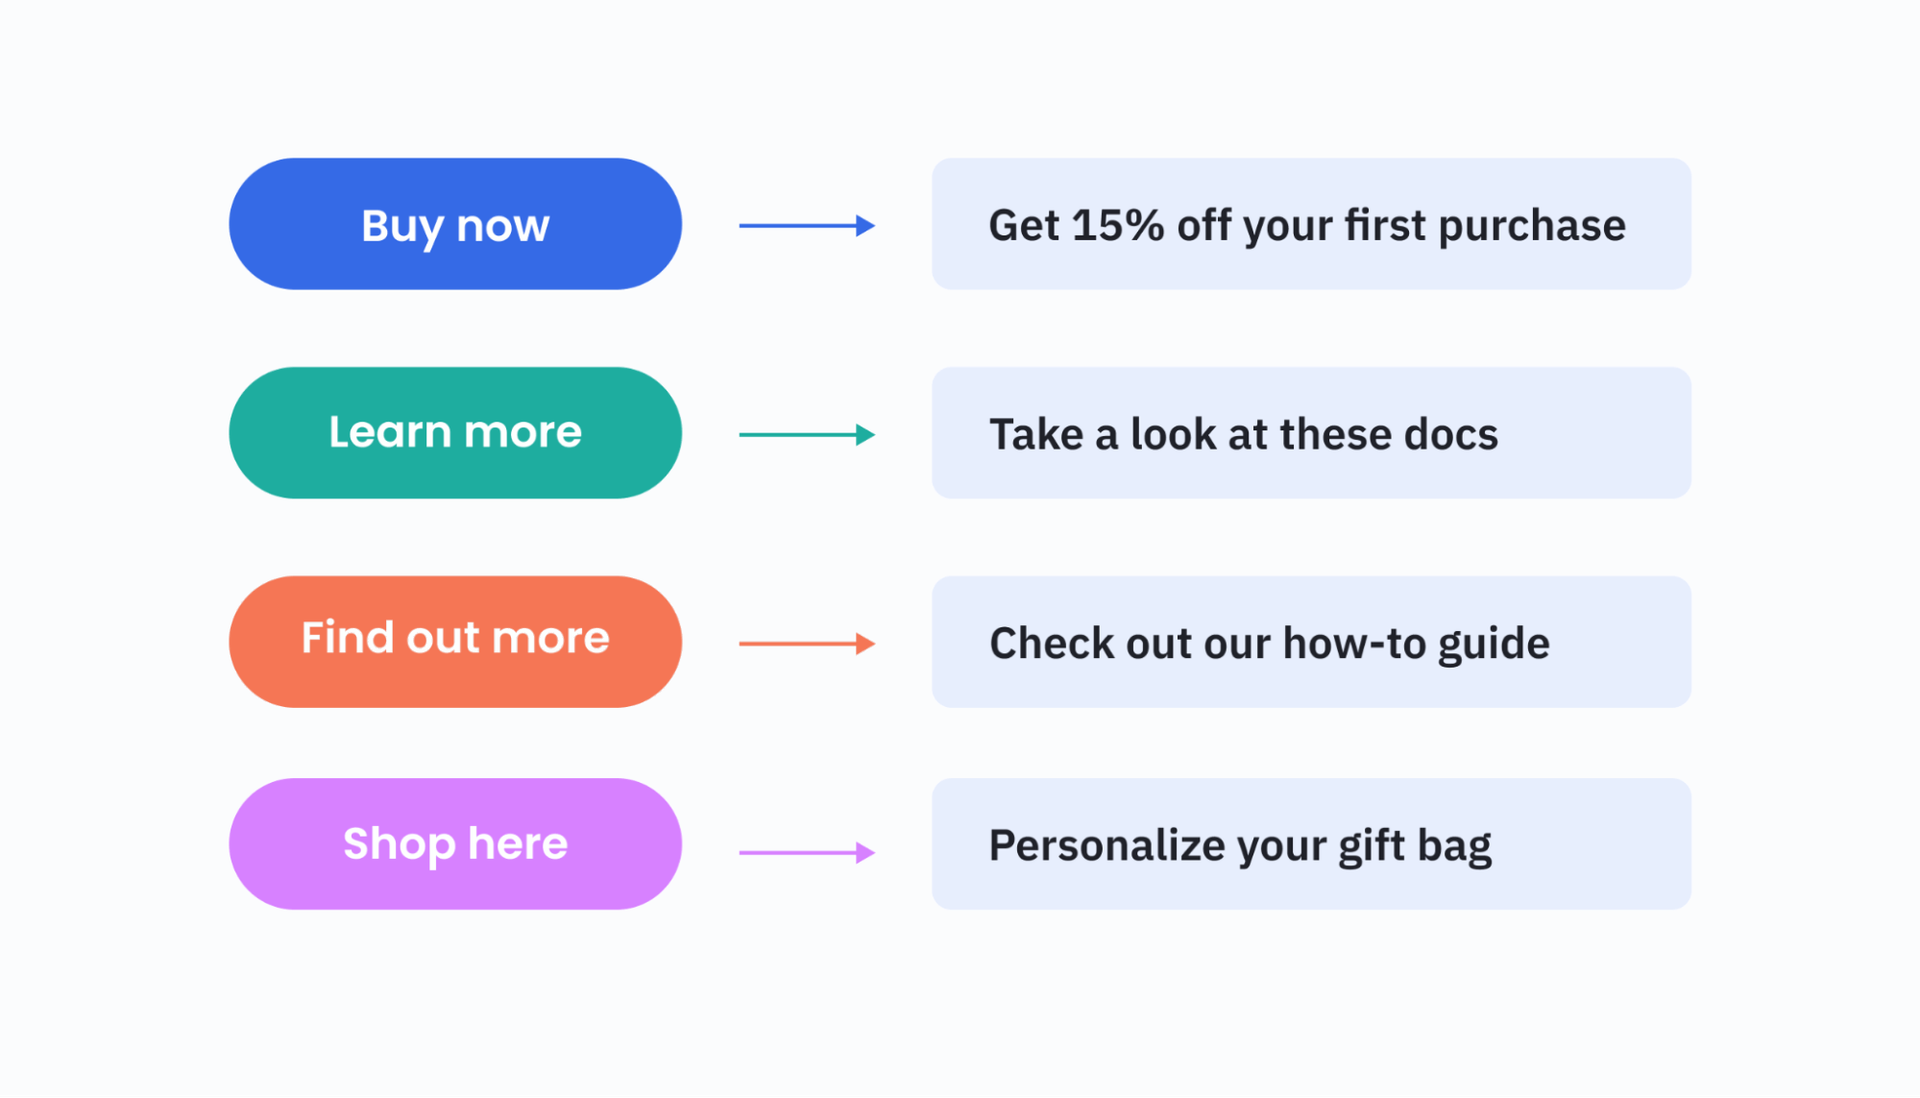
- Use personalized language: 53% of online shoppers believe that a personalized experience is valuable. So personalizing the language of your CTA button is an effective way to encourage your visitors to engage. Check out these examples for some inspiration:
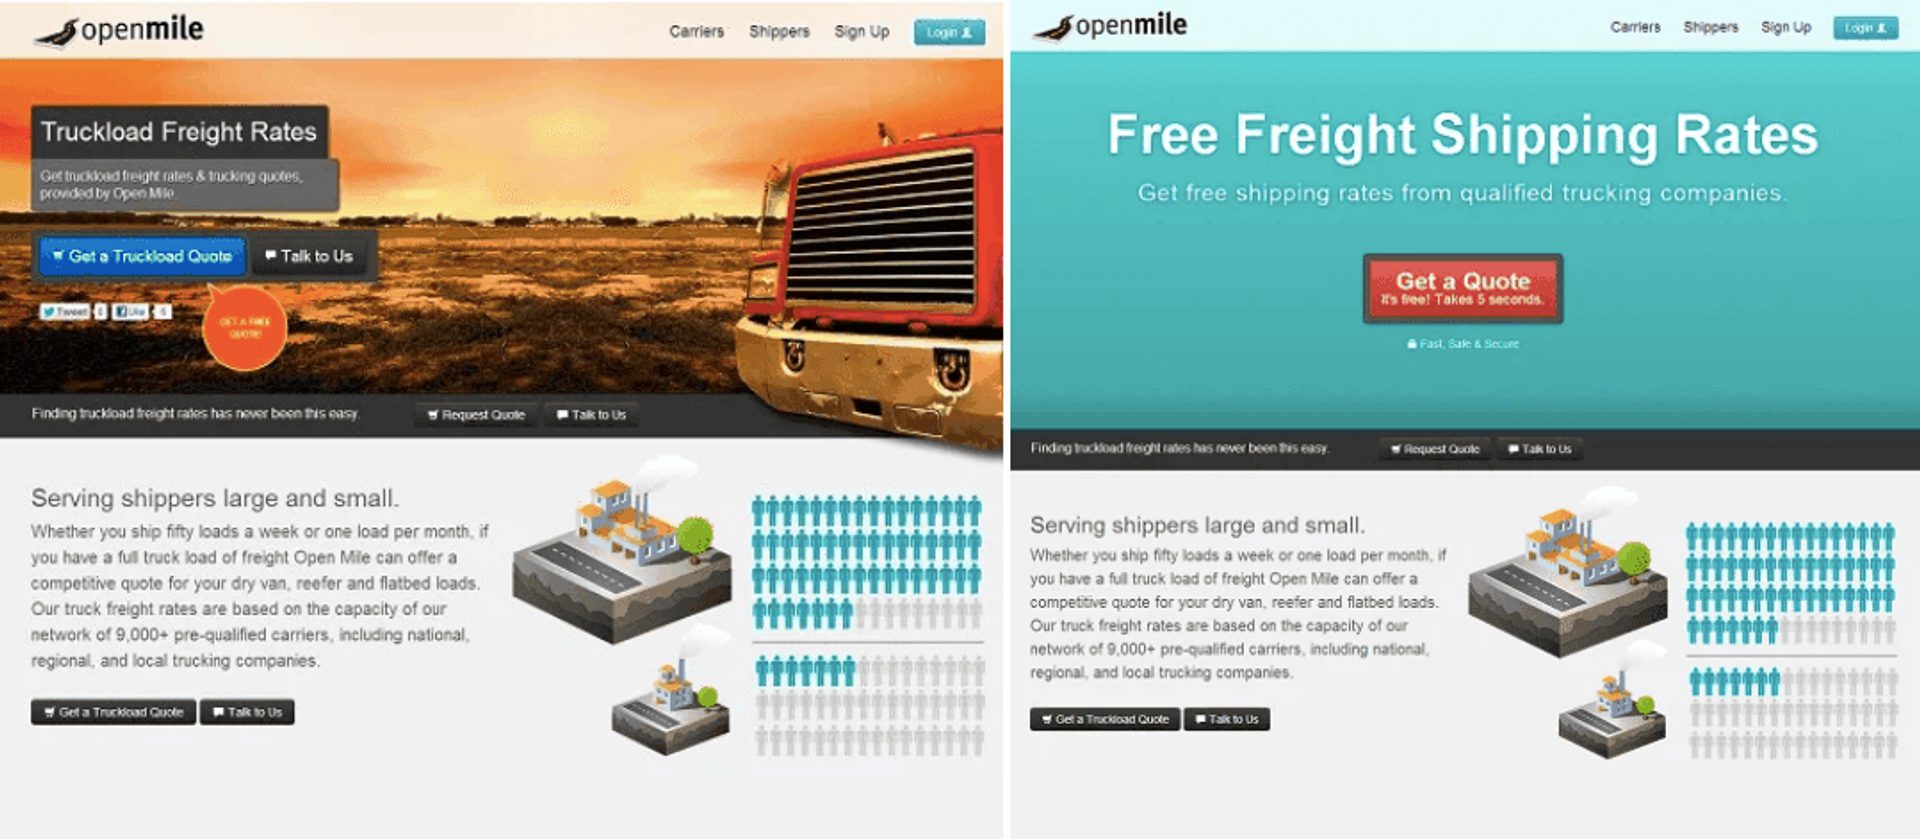
- Remove distractions around your CTA: Open Mile saw a 232% increase in their capture rate when they removed clutter around their CTA. Here’s a shot of the before and after:
5. Think carefully about the information you ask for
Some research shows that shorter forms have higher conversion rates, while others have shown that removing fields resulted in a 14% decrease in conversions.
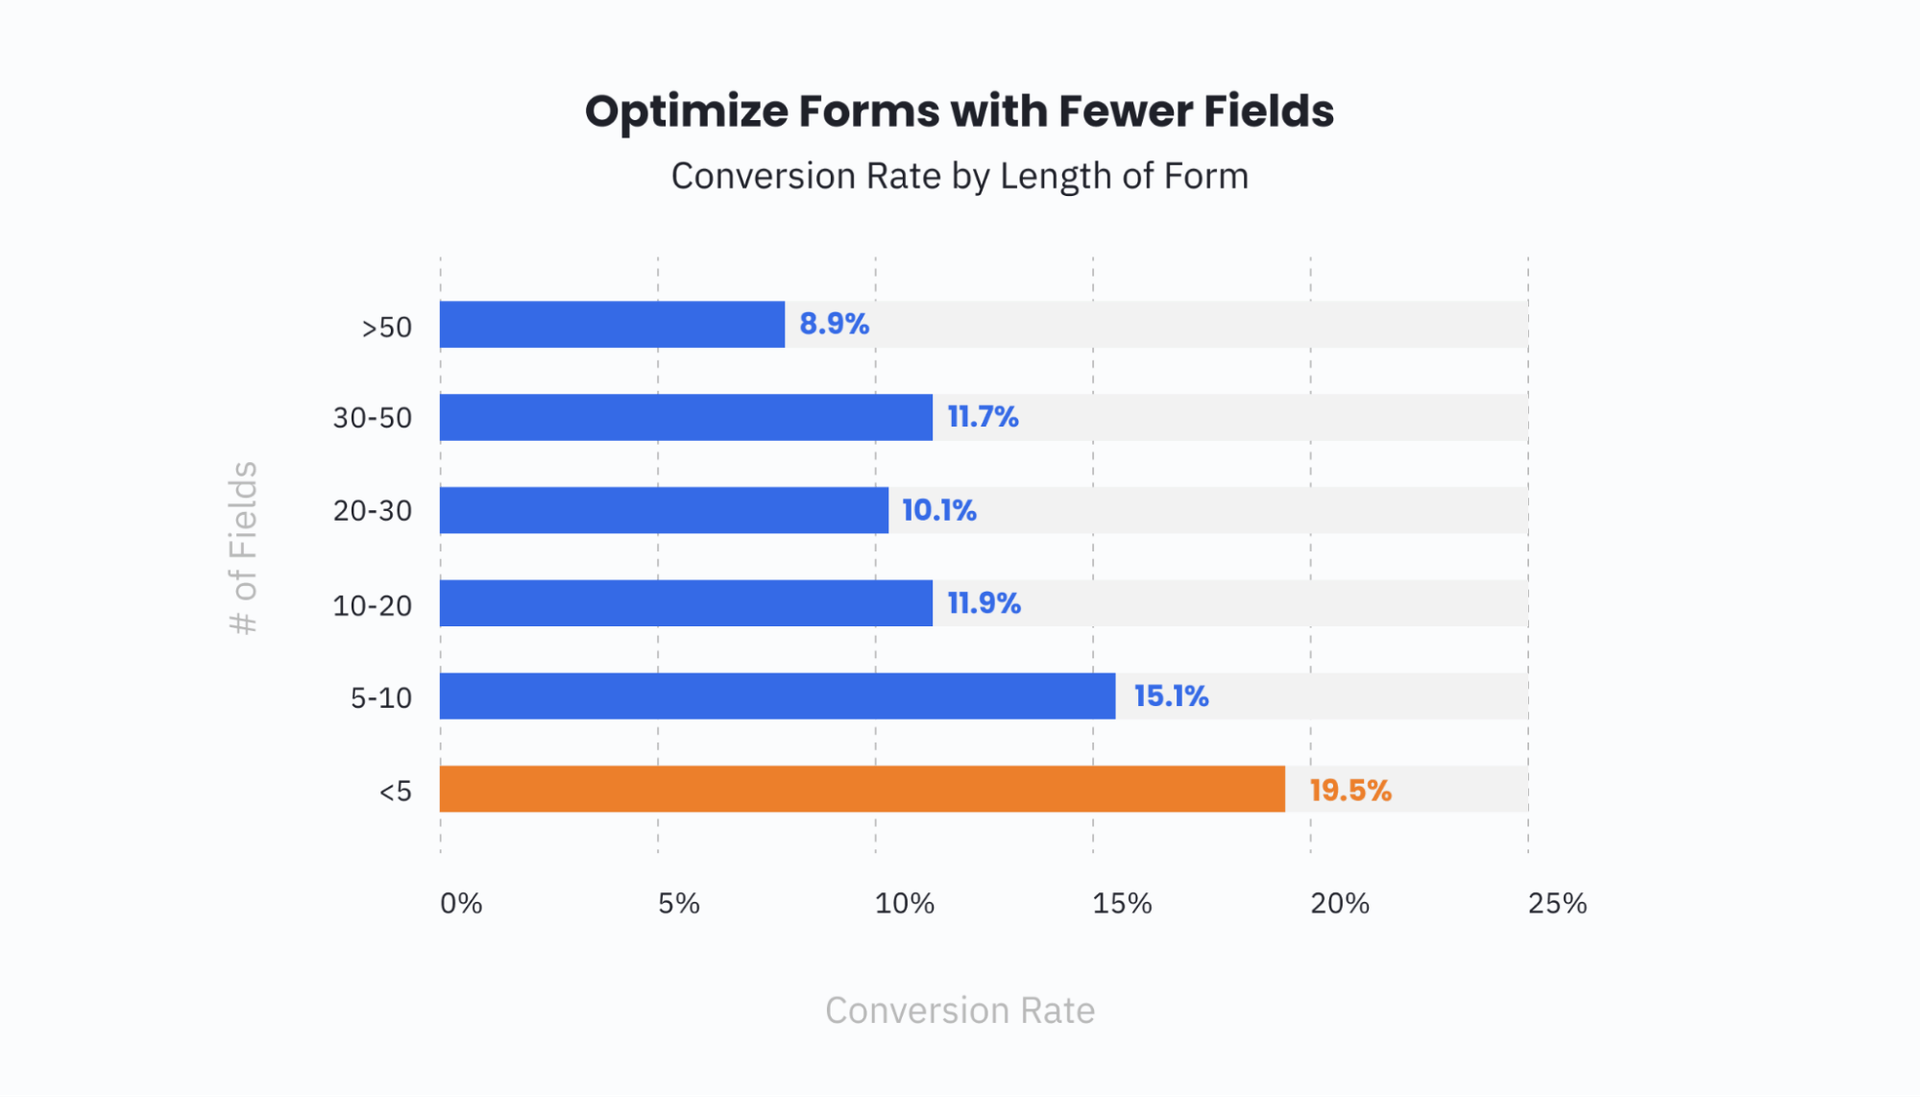
Spend some time comparing the number of fields in relation to the value of what you’re offering.
Is it worth it for someone to fill out 10 fields to get the information? Or do you need to reign it in?
The better balance you have, the more chances you have of generating leads.
Start generating leads with forms from ActiveCampaign
Now you’ve got a solid understanding of what lead generation forms are out there and the best practices for using them.