Being at the right place at the right time is the key to success, so you should expect your emails to do this for you
Making sure your contacts are hearing from you at the right time is important to the growth and success of your business.
That’s a lot of pressure. You’re thinking “How can I know when to send the right message to the right people?” The answer may surprise you...
Let the people decide.
The 6 email marketing automations featured in this post deliver your messages to your contacts based on the actions they take.
Here are the 6 ways to automate a perfect welcome sequence:
- Welcome Sequence
- 7-Day Drip Sequence
- Join Date Automation
- Form Personalization Follow-up
- Webinar Follow-up Sequence
- “Special Day” Coupon
1. Welcome Sequence

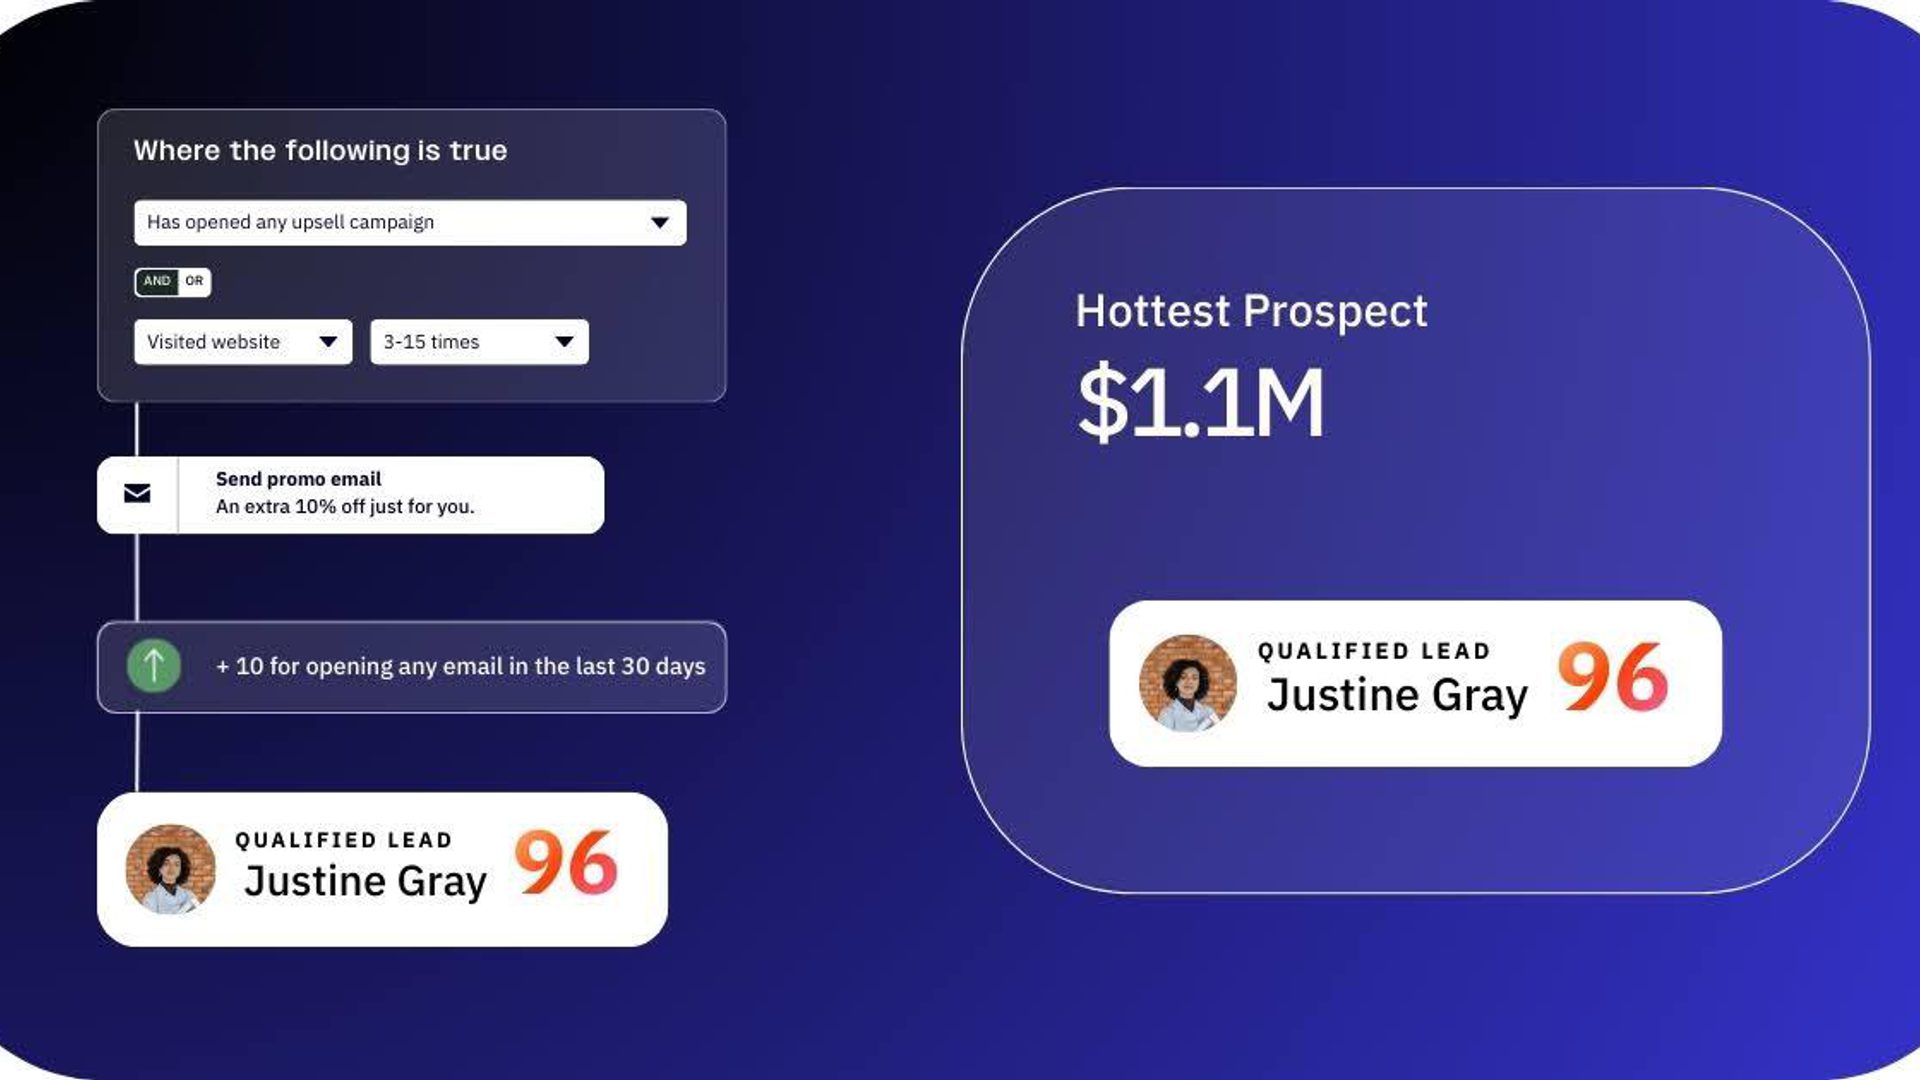
You just got a new contact. This is your best chance to reach out. It’s the moment they’re most engaged. Get more sales, improve your onboarding – achieve whatever goal you want with the perfect welcome sequence.
And (at the same time) see exactly who’s interested in what you have to say.
Here are the steps of this welcome sequence automation:
- When a contact subscribes to your list, they enter the automation.
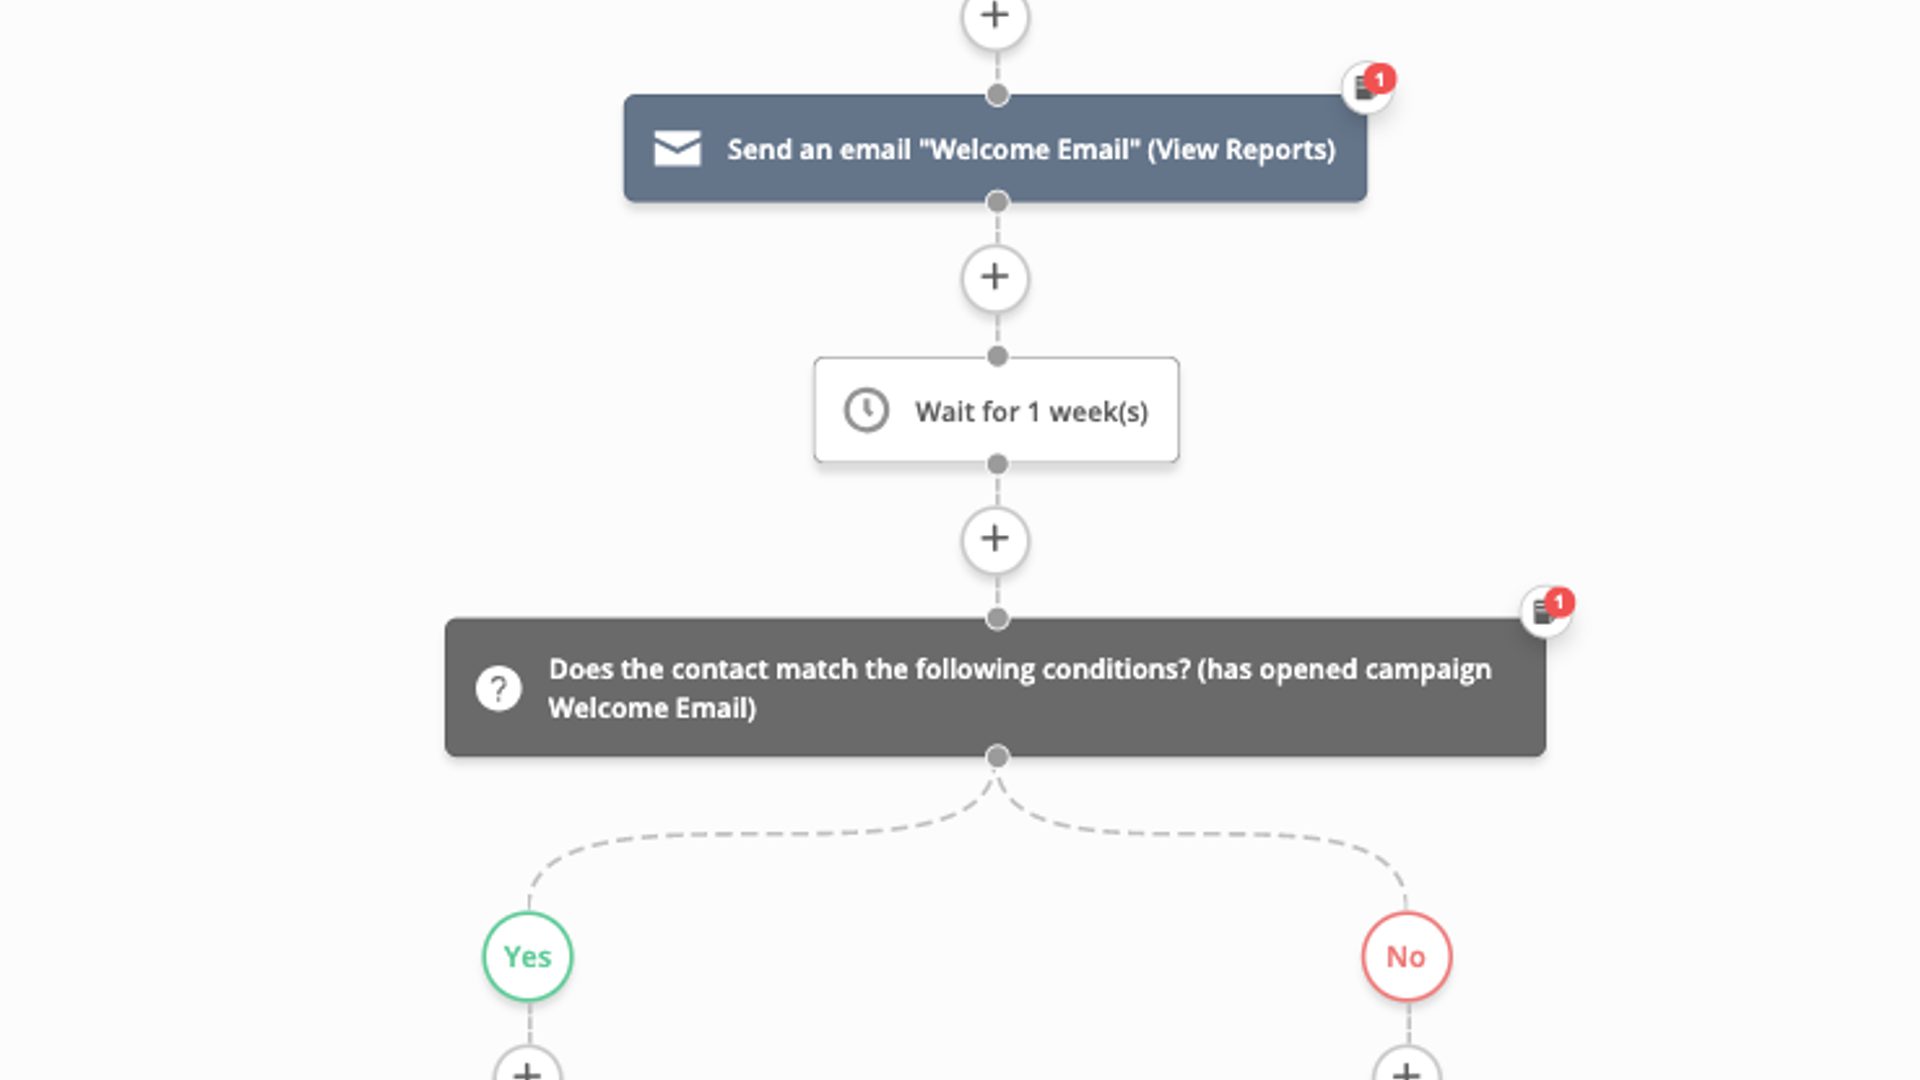
- You send a welcome email introducing yourself (and build excitement)
- After a week, the automation checks if they opened the welcome email
- If they’ve opened, they get an email with the next steps of your welcome series
- If they haven’t opened, the contact receives another welcome email (a little nudge). You can change the subject line or email content to test what works best for you. For maximum brownie points, consider using these free welcome video script templates to boost your customer lifetime value!

2. 7‑Day Drip Sequence
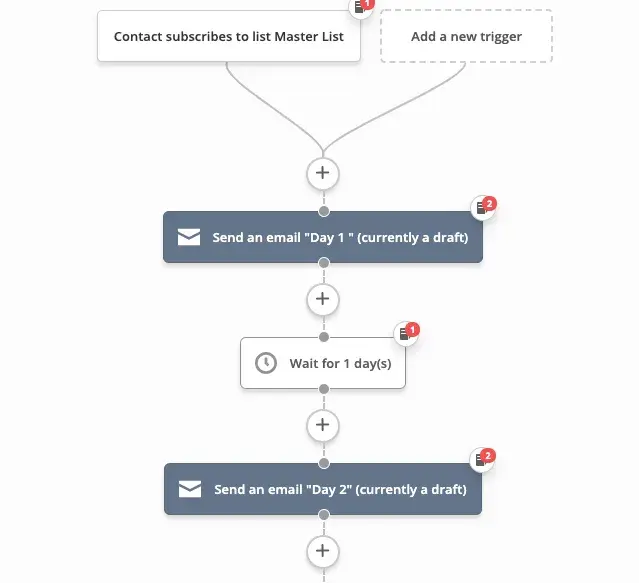
You want to send your new contact information – but you want to dish it out one day at a time.
The perfect welcome sequence for you? A drip sequence.
The 7-Day Drip Sequence is a great way to send out a daily lesson or build hype for a launch. (What should you say? We laid out the 6 emails you should send here).
Here’s how this drip sequence works:
- When a contact joins your list, they enter this automation.
- The contact gets the Day 1 email, then starts a day-long wait step
- This cycle repeats for 7 days (you send one email per day)
- The contact exits the automation
This drip series is flexible too – you can change the start trigger to let your current subscribers sign up for the content. (Just change the trigger to “contact submits a form”).
You can also adjust the wait steps to extend (or shrink) the time between emails. You can stretch the 7-day series to 7-weeks if you want.
Pro tip: You can add a wait step at the beginning of the automation if you want to hold off on sending the first email until a certain time.
3. Join Date Automation
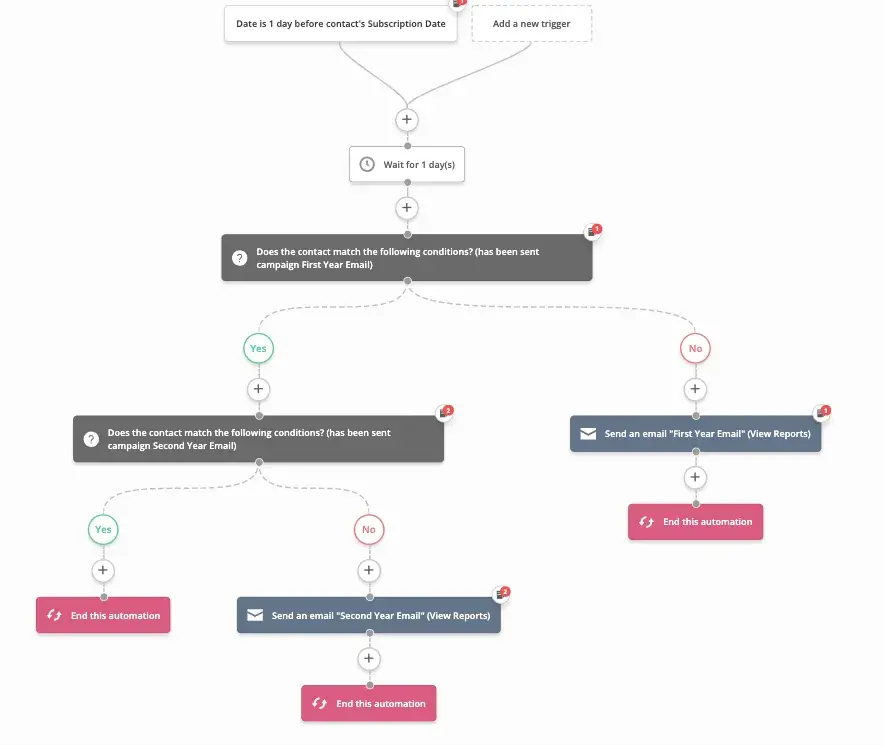
How do you reward your most loyal contacts?
With this automation!
Send an annual email thanking your contacts. The longer a contact has been with you, the bigger your thank-you can be.
Send a coupon, give a behind-the-scenes view, or give them a sneak peek of what’s coming up next year.
Here’s how this automation works:
- On your contact’s subscription date, they enter the automation
- Some if/else steps check to see how long your contact has been with you
- If they’re in their first year the contact gets the “First Year Email”
4. Form Personalization Follow-up

When a contact submits a form, they are giving you specific information about themselves.
This automation uses that info to group them into segments and send out the message that will best match what they’re looking for.
- You have built a form with a custom field
- When contacts submit the form, they enter the automation
- The automation checks to see what contacts have put into the custom field
- The contact gets a tag based on their interests (along with a customized message)
This automation works best when your fields have specific options to choose from. Use it with…
- Dropdown menus
- List boxes
- Radio buttons
The field can check for industry type, which service of yours they want, housing budget for a real estate user, or anything else you want.
If you use more specific lists, feel free to replace the tag action with a subscribe to list action instead.
5. Webinar Follow-up Sequence
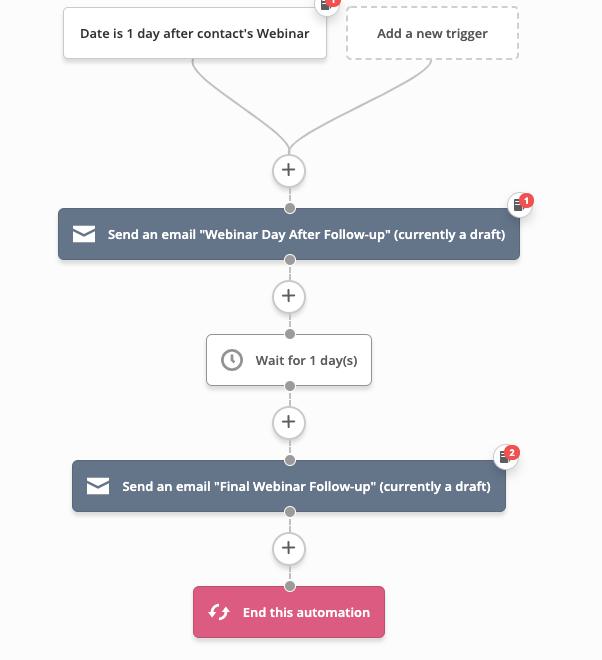
It’s great to remind your contacts about an upcoming webinar, but you also want to use the webinar to make people take action.
- You have a custom date field with the contact’s webinar date
- A day after the webinar, the contact enters the automation and gets the first email
- The contact waits a day and then gets the second email (with a call to action)
Feel free to build out even more messages if you want a longer follow-up!
Pro-tip: You can set the trigger to check the date field at a specific time. This lets you set the time you want the message to go out.
6. “Special Day” Coupon
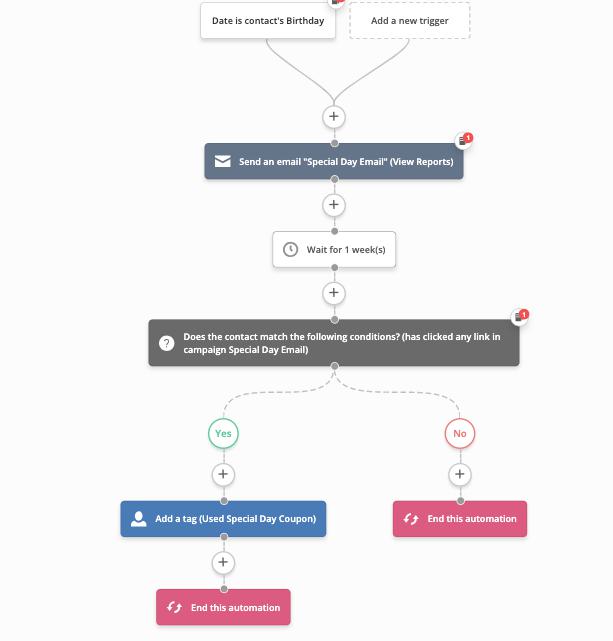
Offer your contacts a discount on their special day!
Birthdays, anniversaries, or other occasions – all great excuses to send a message.
Here’s how this automation works:
- You have a custom date field with the contact’s special day
- When it’s the day in the custom field, the automation starts
- The contact gets a Special Day Email (potentially with a coupon or discount)
- After waiting a week, the IF/ELSE checks to see if they clicked on your link
- If they did, the contact gets a tag – they used the discount
Even if you don’t offer a coupon – this is still a nice email to send. It’s a way to remind your contacts that you remember their big day. (To remove the discount, remove the IF/ELSE and tag actions).