There’s no question about it – sending emails during the launch of an online program, membership or course is essential to launch success.
If you’ve ever tried to launch only with social media, you’ll know why. As soon as you start with those sales messages – all of a sudden your posts just aren’t even displayed. Whereas with email, you’re your subscriber’s choice whether to open or not. Not an algorithm.
In Rival IQ’s 2023, Social Media Industry Benchmark Report, the engagement rate per post (by follower) on Instagram is only 0.47%. Compare this with email’s average open rate of 20-25% and you can see why it is a no-brainer. That’s 42.6 – 53x the engagement of Instagram.
But we don’t want to just send one email.
Over the course of a launch, you’ll typically have a number of key messages you want to get across:
- First, there are any launch event emails. This includes announcements and reminders.
- Then, you have the cart open announcement.
- And, finally, you have all the key deadlines for bonuses, early bird pricing, and, of course, cart close.
And that’s just the logistics.
You’ll also have to answer any frequently asked questions, address objections, share success stories, and showcase the benefits. That’s not possible in just two emails. Typically, across a 7-day launch, you’ll be sending one a day plus extras on the days of any deadlines.
And that’s not including any reminders for pre-launch events like webinars or challenges.
My last launch? I wrote 32.
Before you freak out about that number though, here’s the secret: You don’t send everyone every email.
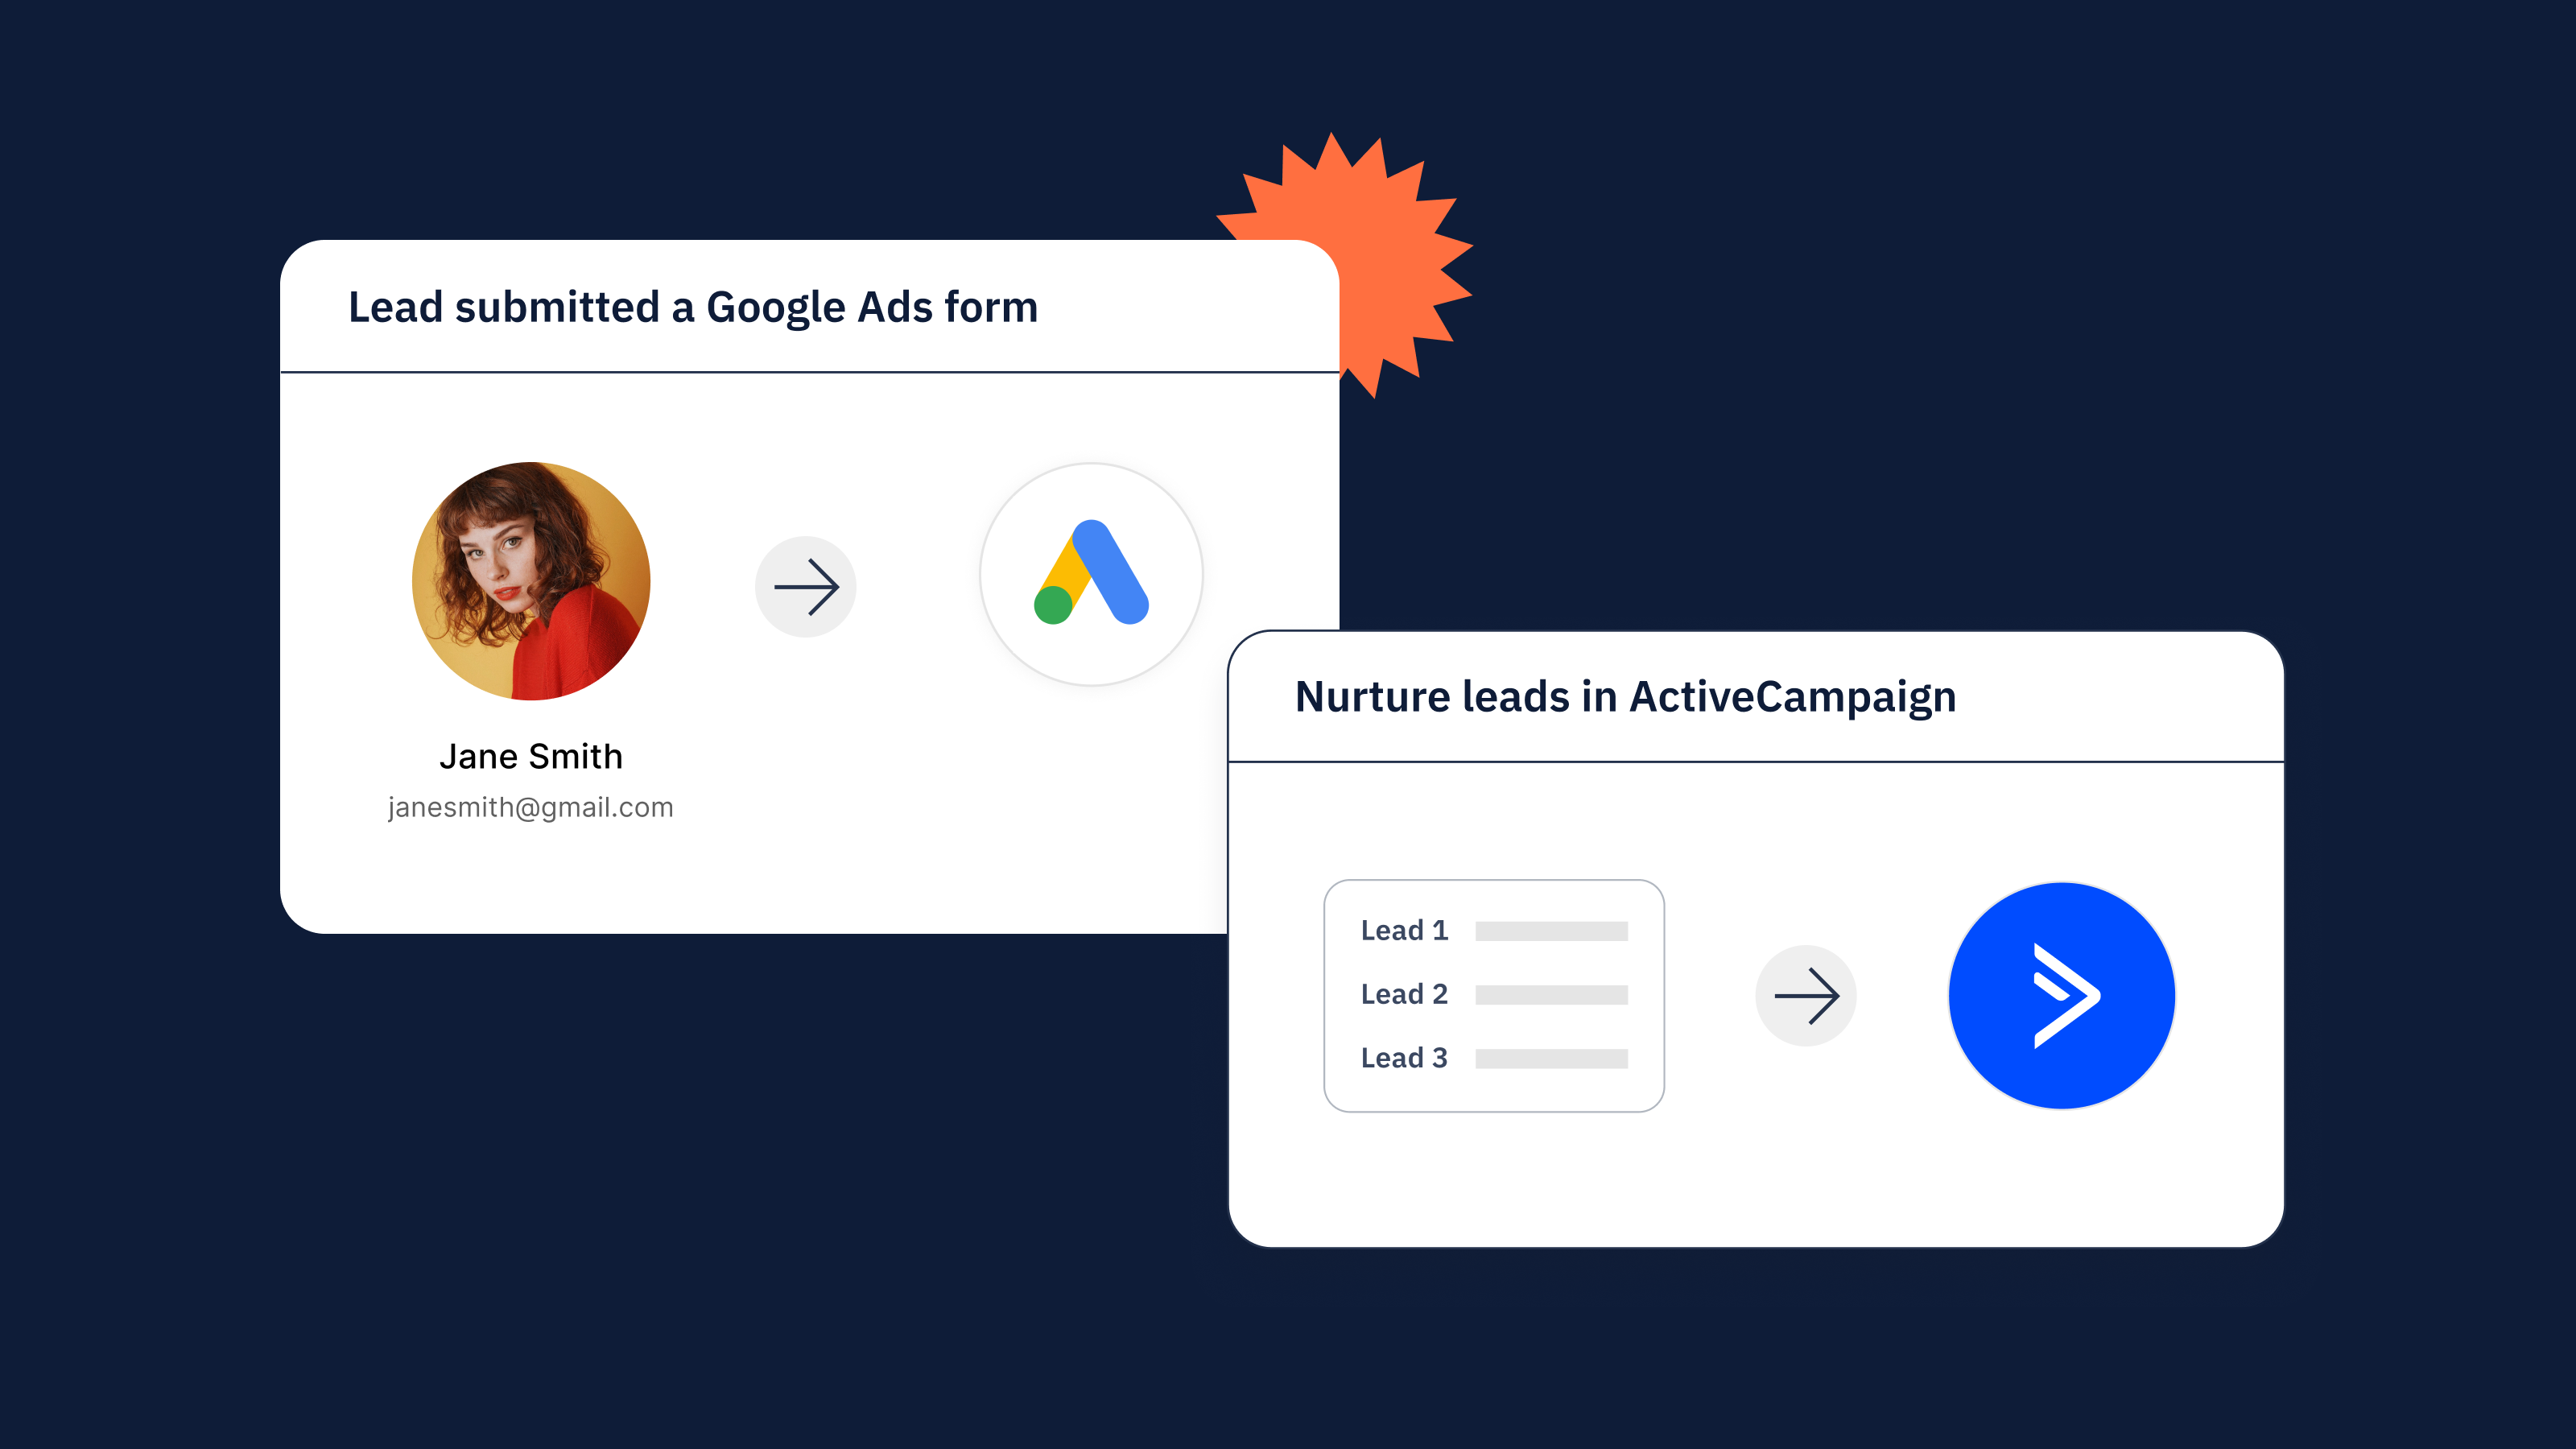
The key to a successful launch that does not annoy your subscribers is to use segments and send the right emails to the right people. And to not send them to those who don’t want them.
To do this within ActiveCampaign, you’ll want to create a number of tags to make this possible. Then based on those tags you’ll create the final segments each of those emails go to.
Tags to create
In ActiveCampaign, you have the ability to create and assign tags to your contacts based on demographic, interest, and personal information they give you. Let’s dive into the tags you may want to use to best segment your email list.
The “Interest: Topic” tag
A launch begins well before you first open the cart. Over the course of 4-8 weeks, you’ll want to warm your subscribers up with great, connecting content, helpful information, and plenty of opportunities for engagement. During this time, you should proactively identify those subscribers who are the best fit for your offer.
The first way to identify your most interested subscribers is to provide lots of opportunities for them to click through to content that is relevant to your offer. These could be a blog post, podcast episode, YouTube video, or even just a social media post where some great discussion is happening. Or perhaps you could go all out and provide a free downloadable gift.
You could even directly ask them to “vote” on what they are most interested in by creating a URL for each of the possible answers.
Then set up a “Link Action” for any time that URL is clicked:
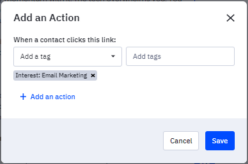
This will give you a short list of subscribers who are interested in that topic and who are also actively engaged with you.
The “Waitlist: Offer Name” tag
As you near the open cart date, you should start planting seeds about your upcoming launch and while you do this, you can invite your subscribers to join a waitlist. In return for joining the waitlist, you can offer them early access and exclusive bonuses or pricing.
Within the emails use a simple call to action to join the list by clicking the link to a confirmation page. On the link click, add the “Waitlist: Offer Name” tag.
The “Event: Title” tag
If you are hosting a webinar, running a boot camp, or sharing a video series to help increase your list size ahead of the launch, you’ll also need to create tags for this.
If you have multiple dates, you’ll need to create a tag for each time slot. For example “Event: Title – Wed 9 am”.
This tag then triggers the automation for confirming their place and also enables you to send even reminders. Either through the automation or as broadcast emails to a segment created based on the event time.
The “Clicked: Sales Page” tag
Once your cart is open, you can use the same Link Action trick to add a tag anytime someone clicks on your sales or offer page. This will help you identify your hottest leads. Armed with that information you can choose to personally reach out to them (the best choice!) or send an automated email or single campaign just to those clicks to check in and see if they have any questions or would like to book a 1:1 chat.
You aren’t just blindly reaching out to anyone, instead, you now have a highly targeted sales strategy.
The “Purchased: Offer Name” tag
All the above tags have been about who you want to send emails to but we also need to know who to exclude.
The first group you want to ensure is excluded is anyone who has purchased your course or membership. Either in the past or during this launch.
To do this ensure anyone who purchases instantly has the tag “Purchased: Offer Name” added to it. This will not only trigger your onboarding automation but it makes it easy for you to exclude them from any future sales emails for that offer.
The “Opt Out: Offer Name Promo” tag
We also want to give our subscribers the opportunity to opt out from receiving this particular campaign, without needing to unsubscribe from everything.
To do this, create a simple Opt Out URL on your website and once again create a Link Action for that when someone clicks that link the “Opt Out: Offer Name Promo” Tag is added.
You can place a line of text in the footer of your email giving them this option or you can choose to make it obvious by placing it right at the top:

If you know there are particular individual subscribers or groups of your subscribers who the offer is not relevant to, you can also choose to manually add this same tag to all those subscribers.
Let’s look at the tags and segments in action
Now you have your tags set up, you’ll be using them in a few different ways.
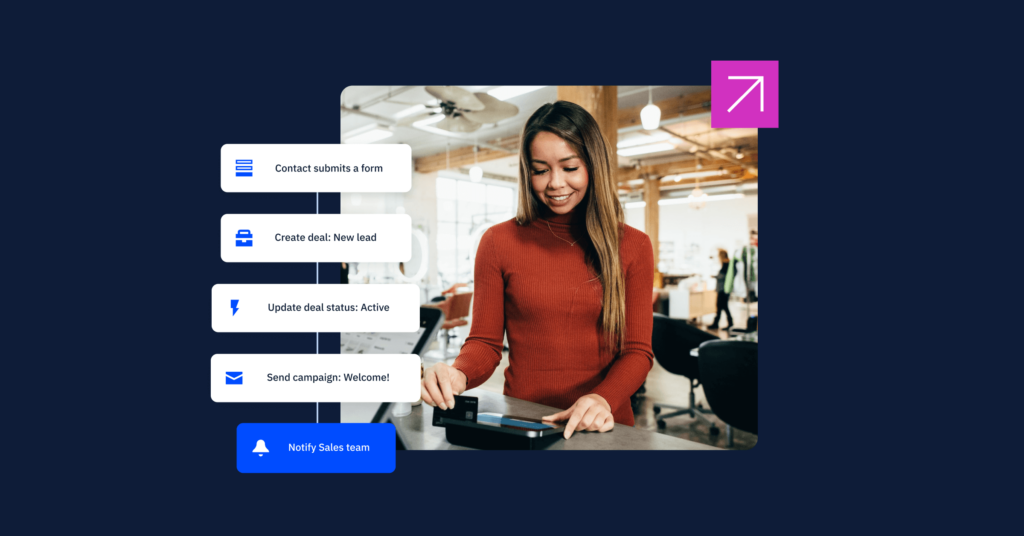
First, they can be used to trigger relevant automations:
- Waitlist: Offer Name > Sends Waitlist Confirmation Email
- Event: Title > Sends Event Confirmation Email
Optional: Add your event reminders to this automation using Goals to move subscribers to the correct date and time. - Clicked: Sales Page > Sends “Any Questions” Email
Note: Ensure there is at least a few hours delay in this one and add an if/else condition to filter out anyone with the “Purchased: Offer Name” tag - Purchased: Offer Name > Sends Welcome Email and Onboarding Sequence
Then you’ll also create segments to send your campaigns to. You’ll want to create each of the following:
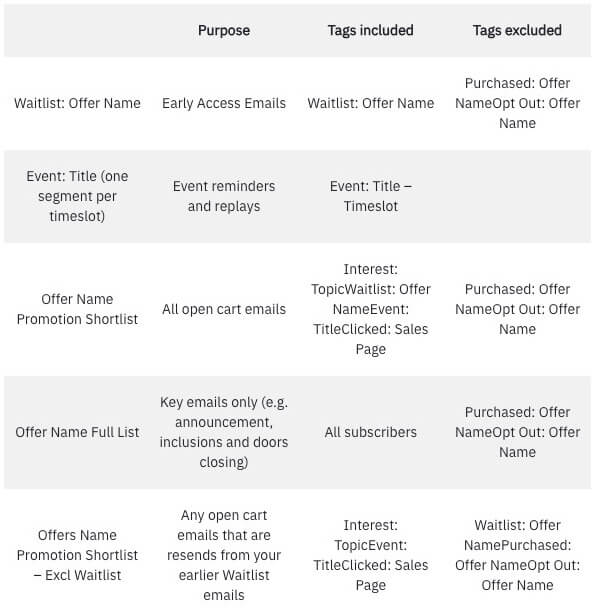
| Purpose | Tags included | Tags excluded | |
| Waitlist: Offer Name | Early Access Emails | Waitlist: Offer Name | Purchased: Offer NameOpt Out: Offer Name |
| Event: Title (one segment per timeslot) | Event reminders and replays | Event: Title – Timeslot | |
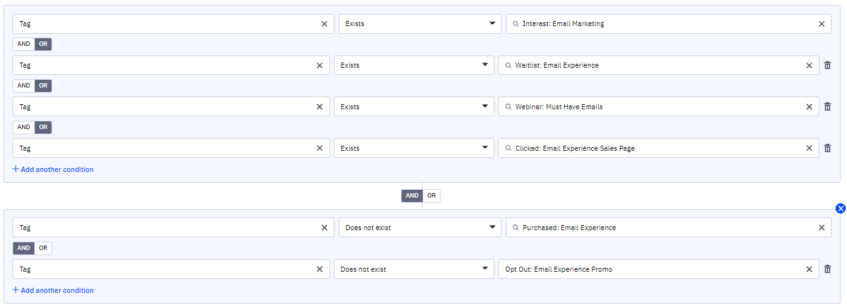
| Offer Name Promotion Shortlist | All open cart emails | Interest: TopicWaitlist: Offer NameEvent: TitleClicked: Sales Page | Purchased: Offer NameOpt Out: Offer Name |
| Offer Name Full List | Key emails only (e.g. announcement, inclusions and doors closing) | All subscribers | Purchased: Offer NameOpt Out: Offer Name |
| Offers Name Promotion Shortlist – Excl Waitlist | Any open cart emails that are resends from your earlier Waitlist emails | Interest: TopicEvent: TitleClicked: Sales Page | Waitlist: Offer NamePurchased: Offer NameOpt Out: Offer Name |
Launches minus the annoying
Once you have grasped the power of tags and segmenting within ActiveCampaign, you’ll feel more confident that your emails are going to the right people. And more importantly, you won’t feel like you are annoying your audience because those emails aren’t going to those who don’t want them.
Yes, launches can be uncomfortable but by using simple strategies like these you can eliminate a lot of that fear and anxiety. With the added bonus of your subscribers feeling like they are looked after with the content and offers they want to see.
If you want more details on what emails to send, when, and to whom, make sure to grab your free email launch plan here.
About the author
Yael Keon is an email marketing consultant with 20 years marketing & strategy experience working in international corporations from high level strategy right down to day to day marketing administration.
With a unique ability to see the big picture and map out practical steps to achieve results, Yael now helps small business owners to navigate their way through the world of email marketing, helping them find the right strategies and methods for their unique business.
This is done through The Email Experience program, courses and one on one consulting projects.
With a strong educational background including a Bachelors of Commerce, an MBA and a lot of self study, Yael believes that by being taught the right principles and given the right tools, you can run a business that supports your lifestyle of choice.
Contact Yael:
- Email: yael@yaelkeon.com
- Website: www.yaelkeon.com
- Facebook: @yaelkeon
- Instagram: @yaelkeon